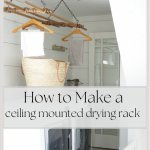
How to Make a Ceiling Mounted Clothes Drying Rack
Are you wanting a practical but beautiful alternative to the traditional dryer in your house? Try this easy step-by-step DIY ceiling-mounted clothes drying rack. It truly makes doing laundry so much more enjoyable!
Yield: 1
Cost: 200 +
Equipment
- Drill
- Screws
- Measuring Tape
- Table Saw or Hand Saw
- Stud Finder
Materials
- Ladder or Antique Drying Rack
- Chain
- Set of Ceiling Hooks
- Attractive Coat Hangers
Instructions
- Measure the desired area using a measuring tape.
- Using the table saw or handheld saw, cut your rack or ladder to fit the space as desired.
- You may need to find the trusses for this if you plan to hang anything too heavy like jeans or bedding. Reinforce the hooks if you need to.
- Attach the chain to the drying rack. If your rack doesn’t have hooks on it already then you will need to attach some.
- Decide on your desired hanging length from the ceiling then cut the chain
- Attach the drying rack to the chains.
- Add coat hangers and enjoy air-dried fresh laundry!