This post may contain affiliate links. Please read our full Disclosure Policy.
Aged terra cotta pots look stunning when filled with vibrant plants or as garden decorations, bringing a rustic charm to your garden, balcony, or living space.
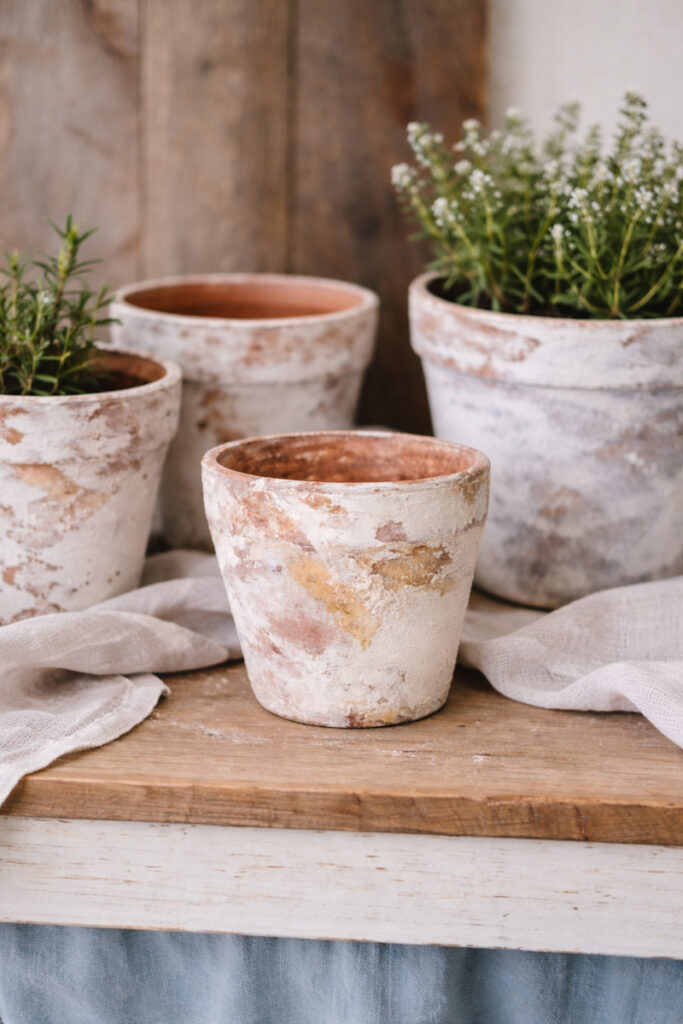
Transforming ordinary terracotta pots into vintage pieces is one of the easiest and most satisfying DIY projects you can do, and the results look like an antique shopping find that you found straight out of a Provence market stall.
Why I’m Obsessed With Aged Terracotta Pots
There is a particular kind of beauty that only comes with age. Not perfection, patina. The kind of worn, chalky, mineral-stained surface that tells you a pot has been sitting in a magical French garden for forty years, holding lavender and rosemary and whatever else the season brought.
I fell completely in love with this look when I was walking through the streets of Provence. Every doorstep, every courtyard, every little café had these gorgeous aged clay pots, some crumbling at the edges, some covered in a soft white bloom of mineral deposits, some so mossy and green they looked like they had grown up out of the cobblestones themselves. I came home and immediately started figuring out how to recreate that look here.

And the good news? You absolutely can, in an afternoon, for under $20, with supplies from your local hardware store.
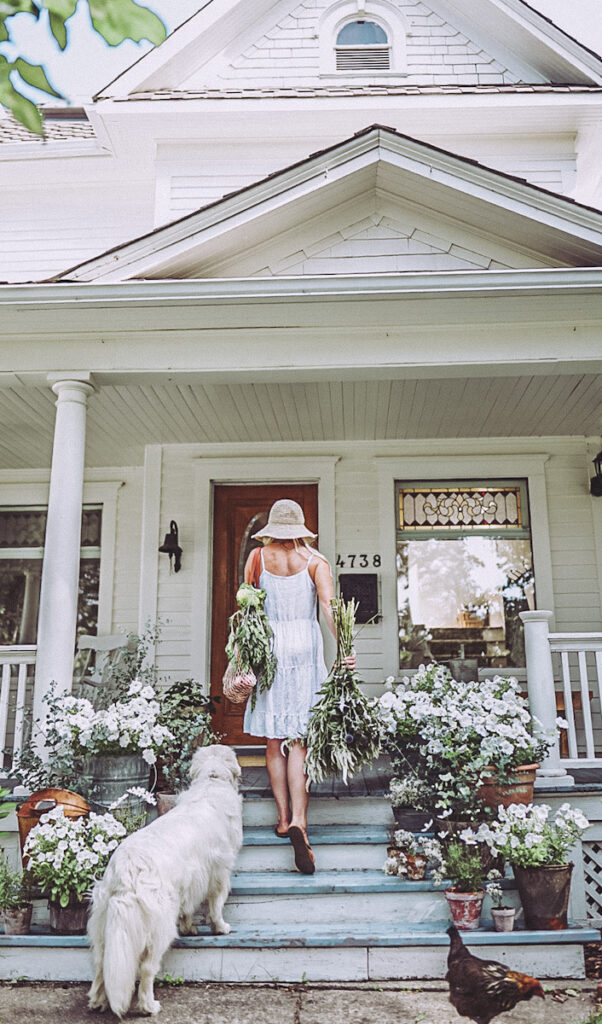
I use these pots everywhere. On the front porch of our 1903 Queen Anne Victorian, tucked into corners of the garden, and even out at our off-grid tiny house cabin where they look completely at home surrounded by trees and wildflowers. They bring that warmth and character to any space without adding clutter, which is exactly the kind of decorating I love.
If you are new here, decorating with vintage and antique pieces is really at the heart of everything I do. And aged terracotta pots are one of the most affordable, beautiful ways to bring that feeling into your home.
What Is Terracotta, Anyway?
Terracotta is a type of unglazed, fired ceramic clay, the name literally means “baked earth” in Italian. It has been used for thousands of years for everything from flower pots to roof tiles to ancient sculptures. The warm orange-red colour comes from the iron content in the clay.

What makes terracotta so wonderful for plants is its porosity. Because the clay breathes, it allows excess moisture to evaporate through the walls of the pot, which is ideal for plants that don’t like wet feet, succulents, herbs, lavender, and most Mediterranean plants absolutely thrive in terracotta.
New terracotta pots are beautiful in their own way, but they lack the depth and character of old ones. That’s where we come in.
Before You Begin | The Supplies You’ll Need
Before we get into the methods, here is everything you might need. You won’t need all of it, it depends on which method (or combination of methods) you choose.
What You’ll Need
- Terracotta flower pots of any size or shape
- Tile adhesive
- Wood stain in a few colours, one a very dark finish
- Drywall Compound
- Paint (various shades of white, cream, grey or green will work), chalkpaint works very well!
- Sandpaper – medium grit works great
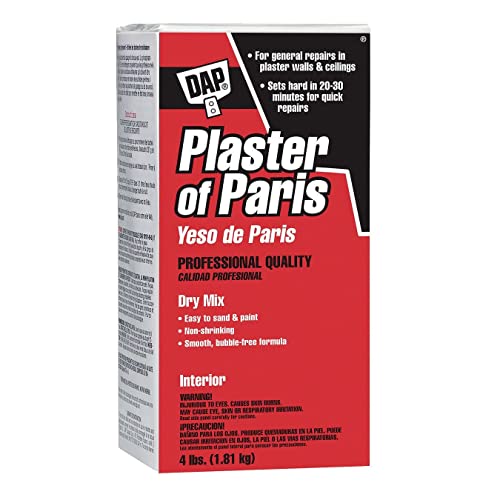
- Plaster of Paris – dry mix
- Cheap Paint brush’s (tile adhesive will ruin them, so don’t use your good ones)
- Matte polyurethane spray
- Old T-shirt clothes or painters rags
- Drop cloth or old newspaper to protect your work surface
Find everything you need for aging terracotta pots 5 different ways here.


This large terracotta planter is a great option for these DIY projects!
5 Ways to Age Terracotta Pots (From Easiest to Most Realistic)
I have tried a lot of methods over the years. Some are quick and easy, some take a little more effort, and some, I’ll be honest, don’t work as well as the internet would have you believe. Here is my honest breakdown of the five best methods, starting with the simplest.
Method 1: The Yogurt Method
This is the most popular method you will find online, and for good reason; it actually works, and it is incredibly simple.
Plain, unflavoured yogurt contains live bacterial cultures that, when applied to the surface of a terracotta pot and left in a warm, shaded spot, encourage the growth of moss and algae. The result is a beautiful, organic-looking patina that genuinely looks like the pot has been sitting in a damp garden for years.
What you’ll need:
- Plain, runny yogurt (not Greek, too thick. If it’s all you have, thin it with a little water)
- A clean, stiff paintbrush
How to do it:
- Soak your pot in water for an hour first. This helps the yogurt adhere and gives the bacteria a hospitable surface to work with.
- Using the paintbrush, paint a thin, even layer of yogurt all over the outside of the pot.
- Add a second layer once the first has dried slightly.
- Place the pot in a shaded, humid spot outdoors. A north-facing wall, under a deck, or in a sheltered garden corner all work well.
- Mist the pot with water every day or two, then leave it alone for 2 to 4 weeks.
The result: A beautiful, soft, mossy-green patina that looks completely natural. This is my favourite method for pots that will live outdoors permanently, because the aging only improves over time.
One honest note: This method requires patience and the right conditions (warmth, humidity, shade). If you live somewhere very dry or very cold (like I do here in Alberta), it may not work as well. And yes, it smells a little funky while it’s doing its thing. That’s normal.
Method 2: The Tile Adhesive and Wood Stain Method
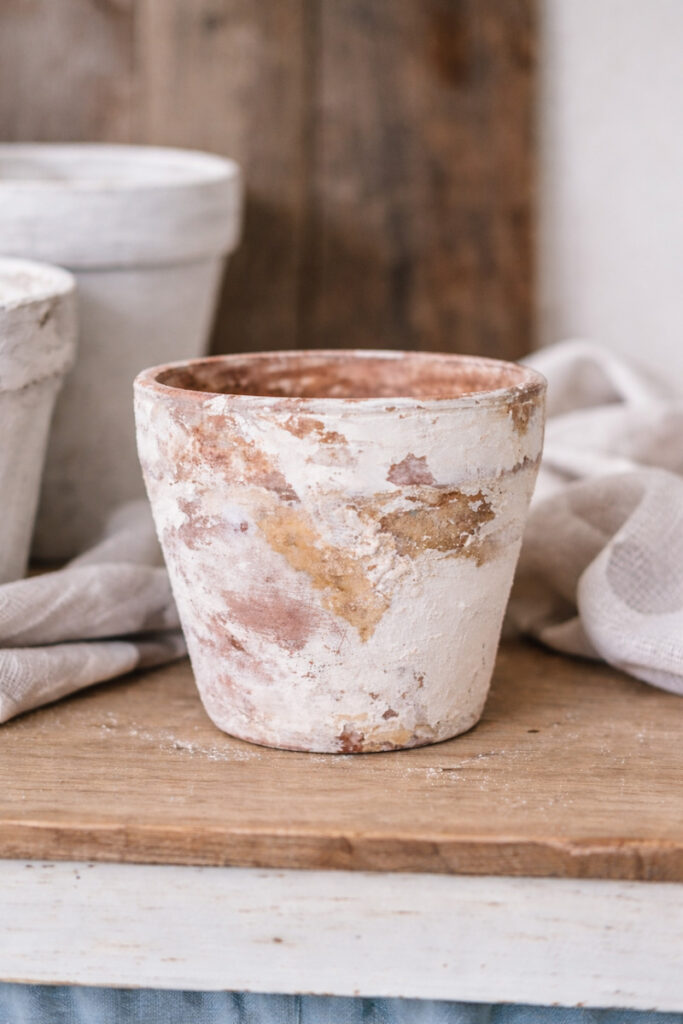
This is one of my two go-to methods for a quick, dramatic result. It gives you that thick, crusty, heavily textured look, like a pot that has been sitting in a Mediterranean garden for decades, accumulating mineral deposits and old paint. This is the closest to what they look like in Europe, in my opinion.
What you’ll need:
- Tile adhesive / mastic
- Wood stain in 2–3 shades, including one very dark (walnut or ebony work beautifully)
- Plaster of Paris – dry mix
- Cheap paintbrushes (the adhesive will ruin them)
- Paper towels or lint-free rags
- Drop cloth
How to do it:
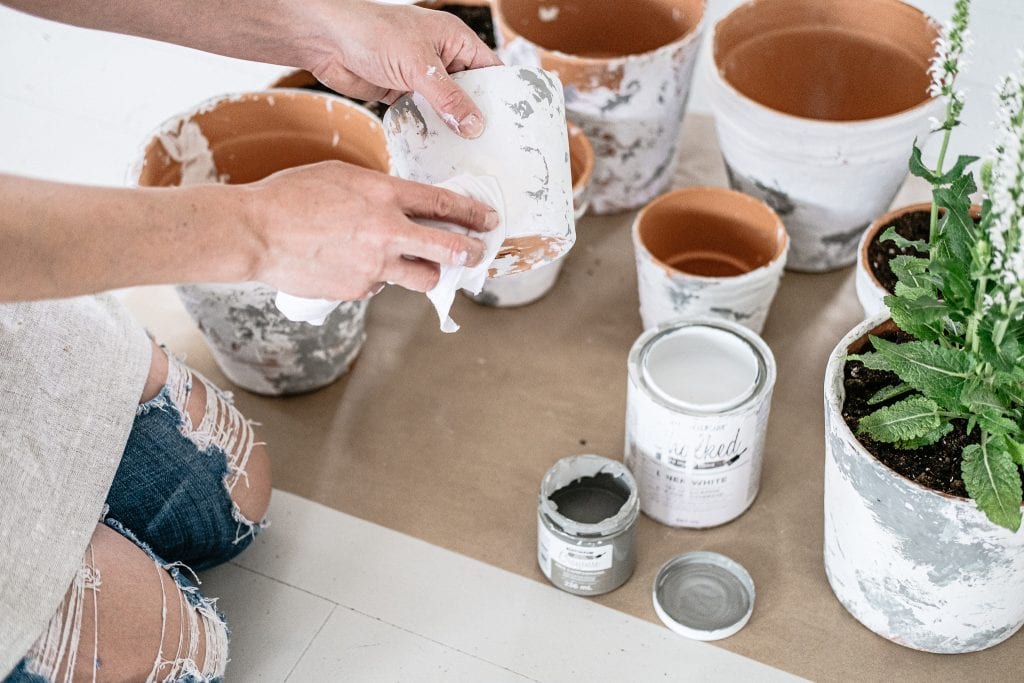
- Remove all stickers and labels from the pot and give it a quick wipe down.
- Using a cheap paintbrush, apply the tile adhesive to the outside of the pot in a dabbing, stippling motion. You are building texture here, not painting a smooth coat. Work in patches, some areas thick, some barely there, for the most realistic result. Important: this will not come off once it dries, so take your time and step back often to check the look.

- Let the adhesive dry completely. This usually takes 30–60 minutes, depending on how thick you applied it.
- In a small bowl, mix a small amount of dry Plaster of Paris into your wood stain to create a watery, paste-like consistency. It should look like a thin, chalky paint. Apply this mixture all over the entire pot and let it dry; it only takes a few minutes.
- Once dry, generously apply your darkest wood stain over the entire surface.
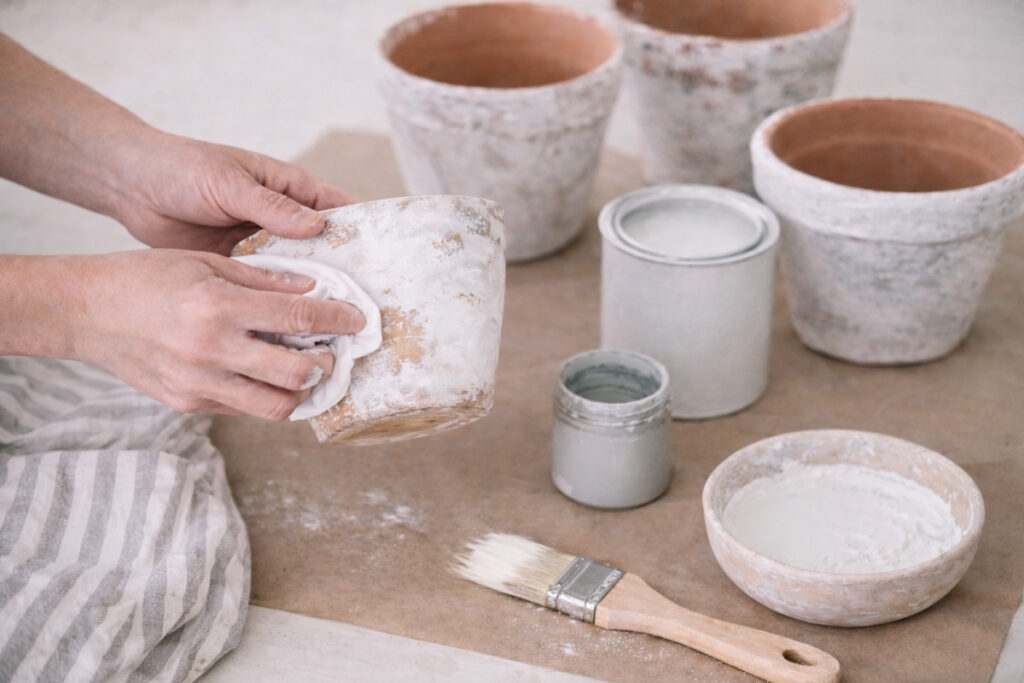
- Immediately begin wiping the pot with a paper towel or rag. Don’t let it dry before you start wiping; you want to pull most of the dark stain back off, leaving it only in the recesses and texture of the tile adhesive. This is what creates the depth.
- Continue wiping until you are happy with the result. You can always add more stain and wipe again.
Optional finishing touch: Dry brush a little green or grey chalk paint over the raised texture for an even more aged look.
Method 3: The Drywall Compound and Chalk Paint Method
This is my other favourite and, honestly the one I reach for most often because it gives you the most control over the final look. The drywall compound creates a soft, plaster-like texture, and the chalk paint layers give you that beautiful, chalky, faded finish that looks like old French painted pottery. If you’ve ever used chalk paint to paint furniture before, it’s a similar finish to that.
What you’ll need:
- •Drywall compound / joint compound
- Chalk paint in white, cream, soft grey, and/or sage green
- Sandpaper – medium grit
- Rags or old t-shirt cloths
How to do it:
- Take your terracotta pot and lightly sand a few areas of the outside. This roughens the surface and helps everything adhere. If you are feeling brave, you can use a hammer and chisel to chip small pieces from the rim. This gives the pot a genuinely broken-in look. (Fair warning: it is easy to crack the pot entirely, so go gently.)
- Using a rag, scoop up some drywall compound and begin wiping it onto the outside of the pot. Work it into the surface, leaving it thick in some areas and thin in others. This unevenness is what creates the texture; you are not trying to make it smooth.

- Let the pot dry completely. Depending on how thick you applied the compound, this could take a few hours or overnight.
- Once dry, take your sandpaper and lightly sand back some of the compound if you feel you applied too much. You want texture, not a solid white coat.
- Apply your first layer of chalk paint. White and cream work beautifully together. Brush one on, let it dry slightly, then dry-brush the other over the top. Sage green or soft grey adds a lovely depth if you want a more aged, European look.
- Using a rag, dab and blend the paint layers together. The different colours should overlap in spots, creating depth and that beautiful, layered, vintage appearance.
- Let dry completely. Sand back lightly again if needed.

The result: A soft, chalky, beautifully textured pot that looks like it came straight from a French brocante market.

Method 4: The Baking Soda and Paint Method
This is a quick, easy method that works well if you just want a simple whitewashed, aged look without a lot of texture.
What you’ll need:
- Baking soda
- White or cream flat latex paint
- Stiff paintbrush
How to do it:
- Mix baking soda into your white paint until you have a thick, slightly gritty paste.
- Using a dry, stiff brush, apply the mixture to your pot in long horizontal strokes, then stipple over the top for texture.
- Let dry completely.
Honest note: Baking soda and water alone (without paint) does not hold up, it washes off immediately. You need the paint as a binder. With paint, this method gives a nice, simple whitewashed look. It is less dramatic than the drywall compound method but faster and easier.
Method 5: The Natural Weathering Method (The Slow Way)
Okay, this one requires zero supplies and zero effort, just time.
Fill your pot with soil, plant something in it, and leave it outside. Water it regularly. Let it get rained on. Let it sit in the sun and the frost. Within one to two growing seasons, your pot will develop its own natural patina of mineral deposits, water stains, and weathering.
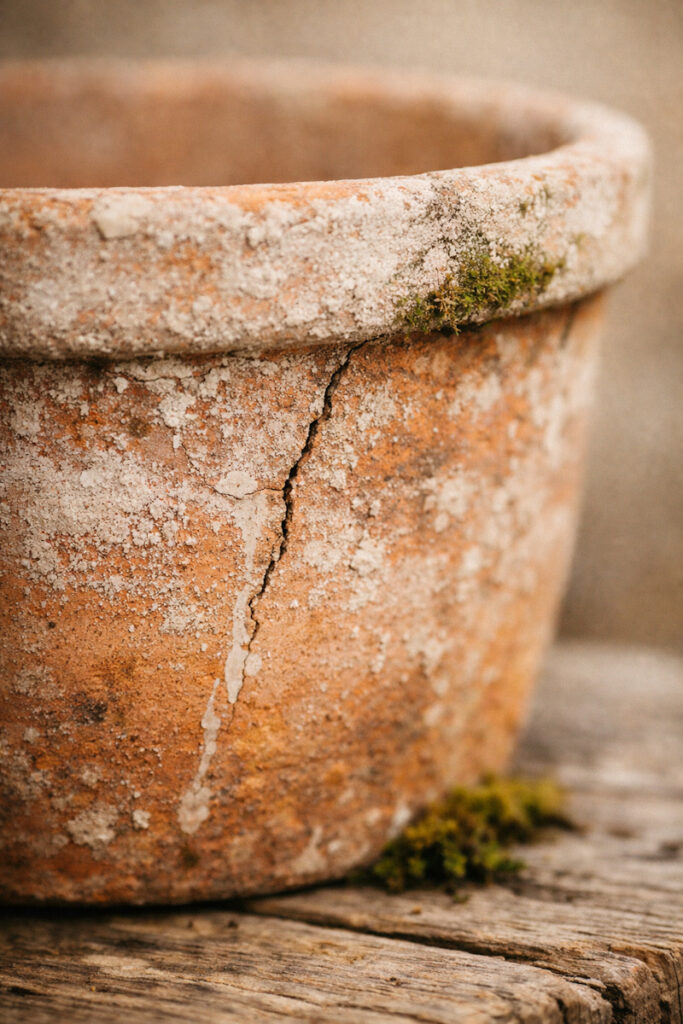
This is how the French pots I fell in love with actually got their look. And there is something genuinely beautiful about a pot that has earned its age.
If you want to speed this up slightly, soak the pot in a bucket of water in full sun for a few weeks. The sun encourages algae growth, and the constant moisture creates mineral deposits.
Sealing Your Pots
No matter which method you use, I strongly recommend sealing your pots if they will be used outdoors, especially the drywall compound and chalk paint method, as both will gradually wash away in the rain without a sealer.

Brush or spray a clear coat of matte polyurethane over the outside of the finished pot. Matte is important here, a gloss or satin finish will make the pot look shiny and new, which is exactly the opposite of what we are going for.
One coat is usually enough. Let it dry fully before planting in the pot or placing it outdoors.
Tips For The Most Realistic Results
A few things I have learned from doing this many, many times:
- Start with imperfect pots. New pots straight from the garden centre are fine, but if you can find ones that already have small chips, cracks, or uneven surfaces, those will look the most realistic once aged. I always check the “damaged” bin at garden centres and ask for a discount, those imperfect pots are actually the best ones for this project. Or garage sales and second hand stores are a gold mine for old terracotta pots!
- Work in layers. The most realistic aged pots have depth, multiple layers of colour and texture that you can see in the recesses and highlights. Don’t try to get the perfect look in one coat. Build it up slowly.
- Less is more with tile adhesive. It is very easy to go overboard with the tile adhesive and end up with a pot that looks like it is covered in lumpy oatmeal rather than aged mineral deposits. Apply it sparingly in patches, step back often, and err on the side of less.
- Do not apply the drywall compound to the bottom of the pot. Doing so will cause the pot to sit lopsided and leave marks on your surface when watering the plant.

- Don’t skip the dark stain. If you are using the tile adhesive method, the dark stain wiped into the recesses is what makes the whole thing come alive. It creates shadow and depth that makes the texture look three-dimensional.
- Let them actually weather. Even if you use the drywall compound or tile adhesive method, leaving your finished pots outside for a season will only improve them. The edges will soften, the colours will fade slightly, and they will start to look genuinely old rather than DIY-aged. You can also rub the pot in the grass to get “grass stains” on it! This also has a fun effect on the pot.
Where to Use Your Aged Terracotta Pots
Once you have a collection of these beautiful, aged pots, the styling possibilities are endless. Here are a few of my favourite ways to use them:
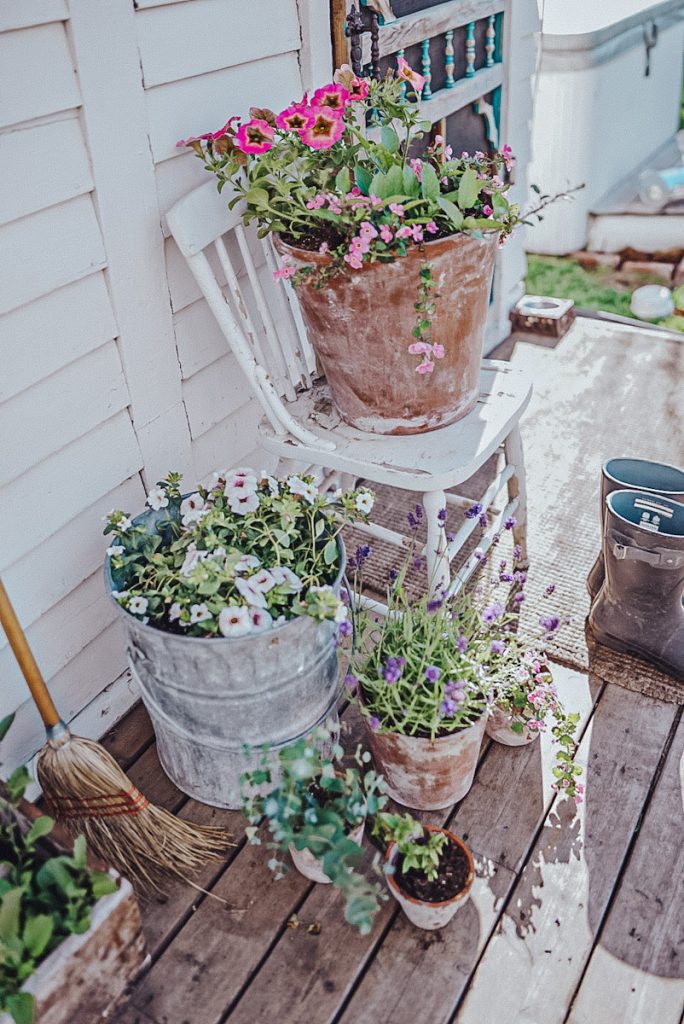
On the front porch, a patio space or entry steps. A cluster of aged pots in different sizes, filled with trailing herbs, lavender, simple greenery, or other favorite patio flowers, creates an instant French farmhouse welcome. This is one of my favourite things about our Victorian, the front porch is the perfect spot for a whole collection of them.
In the garden. Plant beautiful flowers in these pots and tuck them into garden beds among the flowers, or line them along a stone wall or fence. The aged terracotta blends beautifully with natural materials.
As indoor decor. You don’t have to put plants in them! A grouping of empty aged pots on a mantle, bookshelf, or kitchen counter is a beautiful, simple, vintage-inspired vignette. Fill them with dried botanicals, a single stem, or just leave them empty.
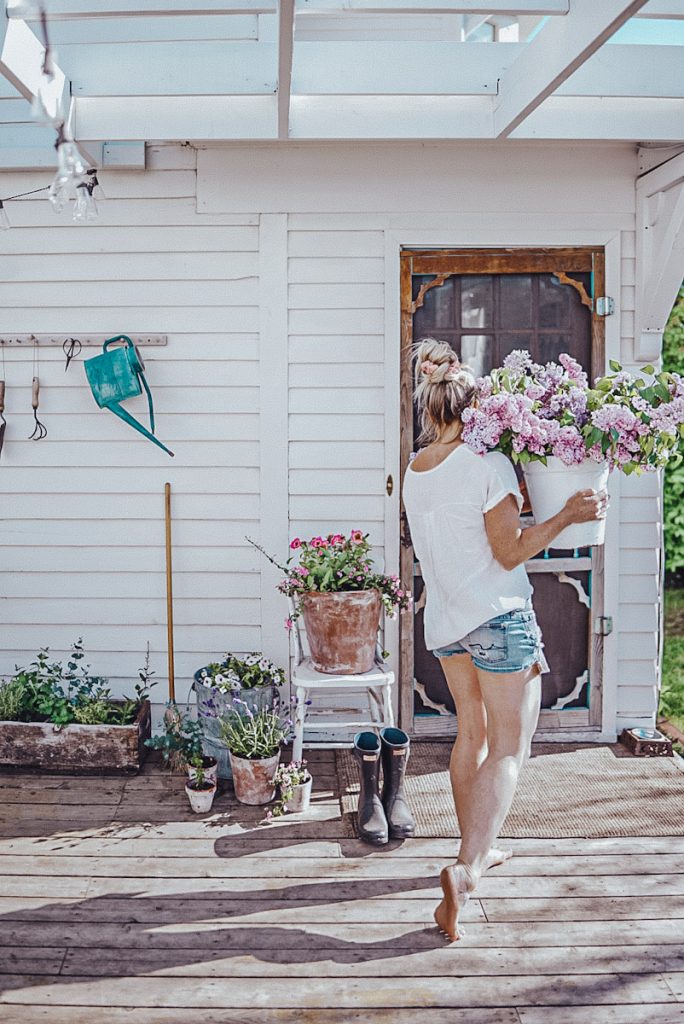
At the cabin or cottage. I love using these at our off-grid tiny house, they look completely at home in a natural, wooded setting. A few aged pots on the deck railing filled with herbs or wildflowers is one of my favourite simple summer touches.
More Easy DIY Projects You’ll Love
- How to Age Galvanized Metal
- DIY Antique Brass Chandelier Tutorial
- Beginners Guide To Painting Furniture
- How To Refinish Furniture to Raw Wood
Your Questions
The most effective methods are the drywall compound and chalk paint method (for a soft, chalky, French-painted look), the tile adhesive and wood stain method (for a heavily textured, mineral-deposit look), and the yogurt method (for a natural, mossy, organic patina). Each gives a slightly different result, and I love mixing methods to create a varied collection.
Yes!! Soaking your pots in water for at least an hour before applying any coating (yogurt, drywall compound, tile adhesive) helps the material adhere better and gives a more even result. It also prevents the dry clay from sucking moisture out of your coating too quickly.
Absolutely, and it is one of my favourite materials for this project. Chalk paint gives a beautiful, matte, chalky finish that looks very similar to old French painted pottery. Layer two or three colours (white, cream, and a soft grey or sage green work beautifully together) and dry brush them on for the most realistic result.
If the pot is left unsealed, yes, the drywall compound will gradually wash away with rain and watering. I actually love this for outdoor pots because it makes the aging look even more natural over time. But if you want to preserve the exact look you created, seal the outside with a matte polyurethane spray.
The yogurt method is the most effective for encouraging real moss and algae growth. Apply plain yogurt to the outside of the pot, place it in a shaded, humid spot, mist it daily, and wait two to four weeks. You can also dry brush a little green chalk paint over the surface for an instant moss effect, though it won’t look quite as natural.
A matte polyurethane spray is my go-to. It protects the finish without adding any shine that would make the pot look new. Apply one coat to the outside of the finished pot and let it dry fully before placing it outdoors.
Get More Vintage DIY Ideas Straight to Your Inbox
I share new DIY projects, vintage decorating ideas, and from-scratch recipes every week, the kind of content that helps you build a home that feels beautiful, intentional, and genuinely yours.
If you want to be the first to know when something new goes up, join the B Vintage Style community below. I’d love to have you there.
xo, Deborah
want to save this recipe?
Enter your email & I’ll send it to your inbox. Plus, get great new recipes from me every week!
By submitting this form, you consent to receive emails from B Vintage Style.

Easy DIY Aged Terra Cotta Pots
Equipment
- Painters rags or paper towel
Materials
Instructions
- Begin by removing all the stickers and labels on the pots
- Apply the tile adhesive in a dabbing motion using a paintbrush. This will ruin your brush so be sure not to use a high-quality brush for this part. You can add a lot or a little depending on how you want your pots to turn out. Remember, this will not come off so if you are looking for an authentic look, don't go overboard.
- Mix a bit of Plaster of Paris into some wood stain to produce a watery paste-like consistency. Apply this pasty paint all over the pots and let them dry!
- Once the flower pots are dry, generously apply the darkest stain, and then begin to wipe the pot using a paper towel or rag! You don't want to let this part dry before you begin wiping.
- Continue to wipe the pots until you are happy with the look of the flower pot.
- Optional – You could add a bit of green paint to the edges of the pot with a separate brush for a different look.
Video
when aging terra cotta pots, what do you use as “tile adhesive”? Mortar? If so, what color?
Any Brand will work. And they will be a shade of off-white and any of them will work!
I love this!! When buying vintage isn’t an option and you get clever to make your own “vintage”, makes for a great day.
Thanks for sharing this DIY:)
Yesss!! Sometimes finding vintage finds isn’t always an option! Thanks for your comment.