This post may contain affiliate links. Please read our full Disclosure Policy.
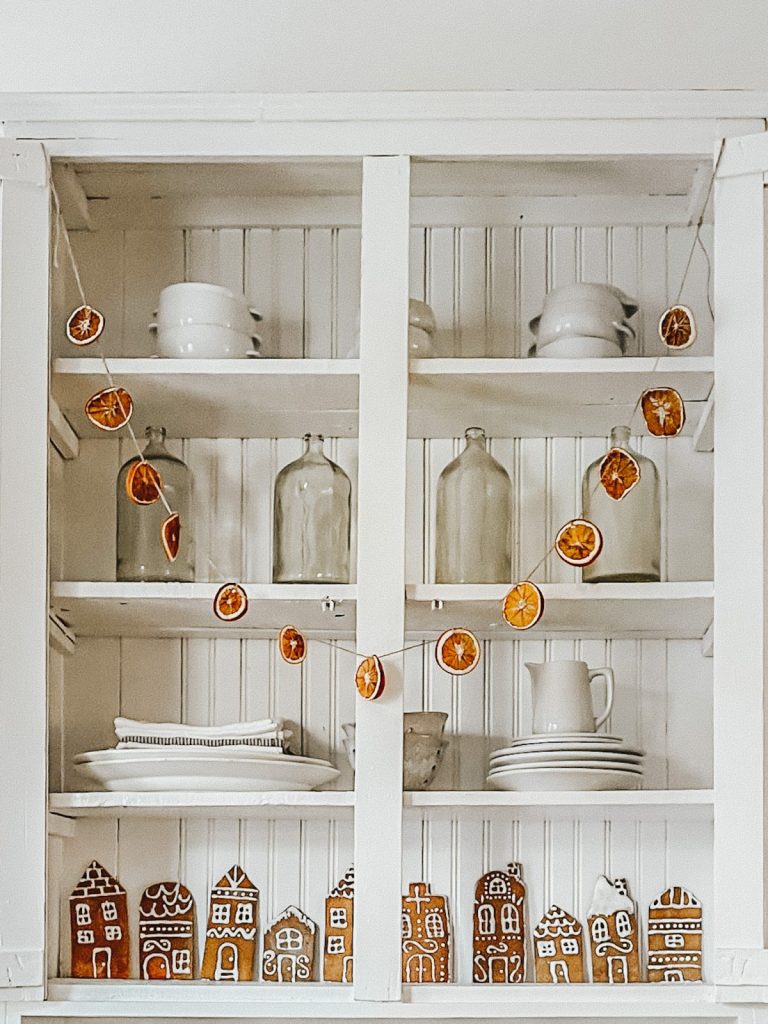
Homemade dried orange garland is beautiful during the holiday season. Simple and elegant, it adds a pop of color to any space and looks beautiful displayed on its own or with other Christmas decorations!

I love adding natural Christmas decorations to my home during the holidays. Dried orange slices are a favorite because they are so classic and look amazing no matter what type of home decor style you have.
Orange Garland At Christmas
Orange garland is not only a very easy DIY to make but it is also a very affordable type of decorating. It will leave your home smelling amazing and give the nostalgic feel of Christmas time.
Where to Use Orange Garland
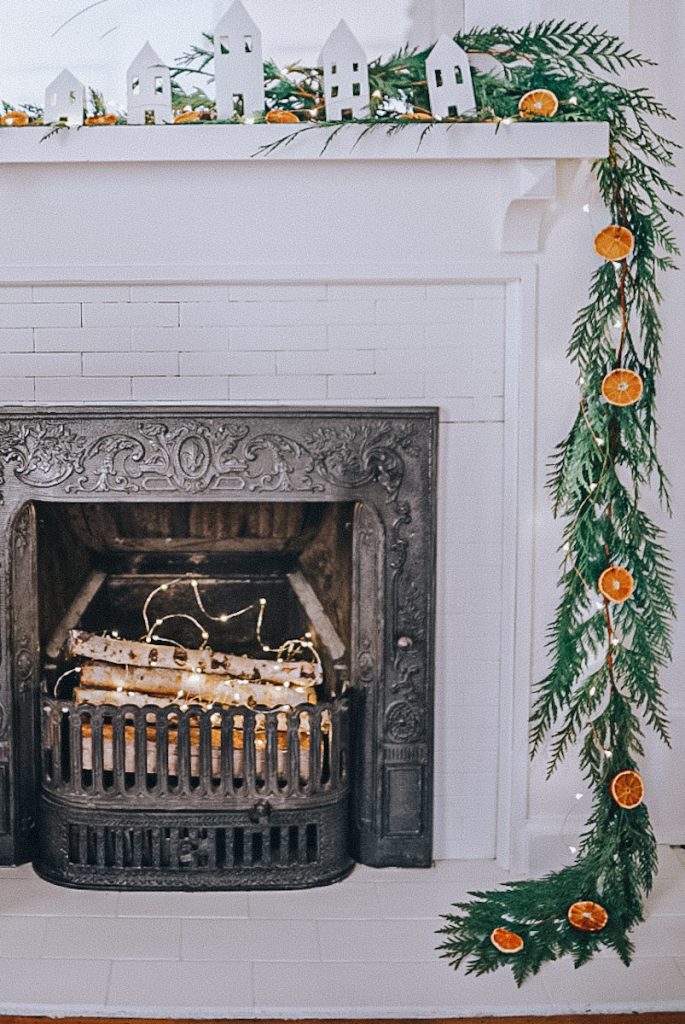
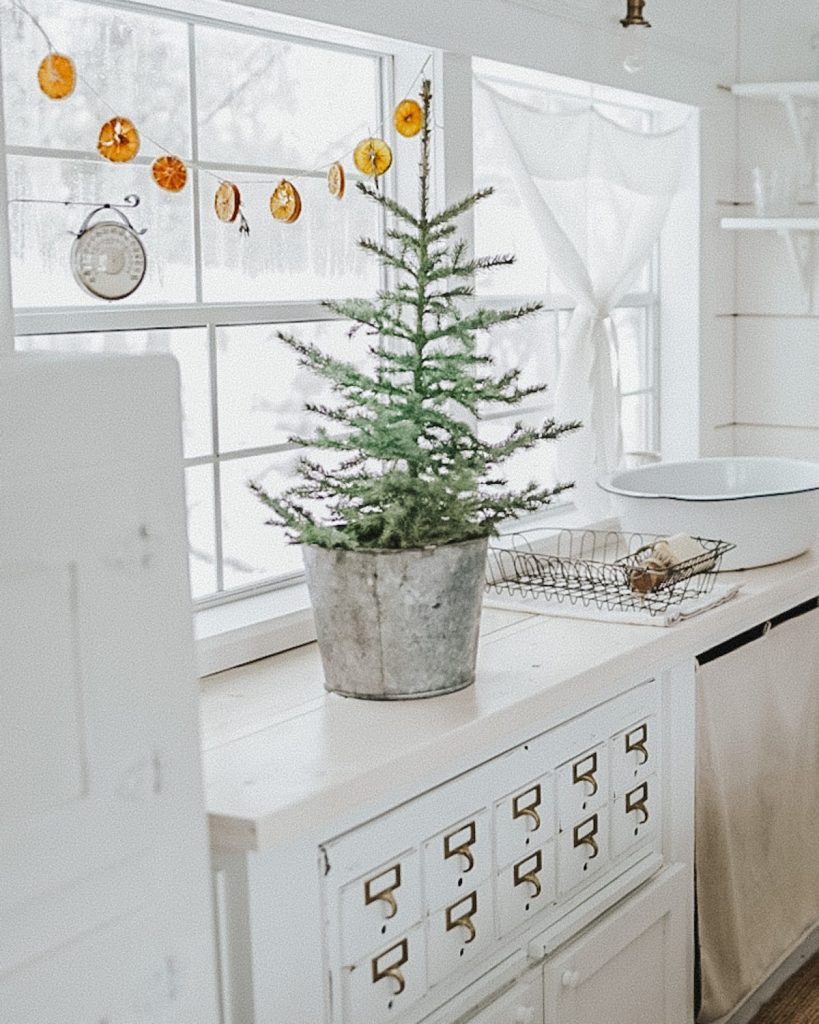
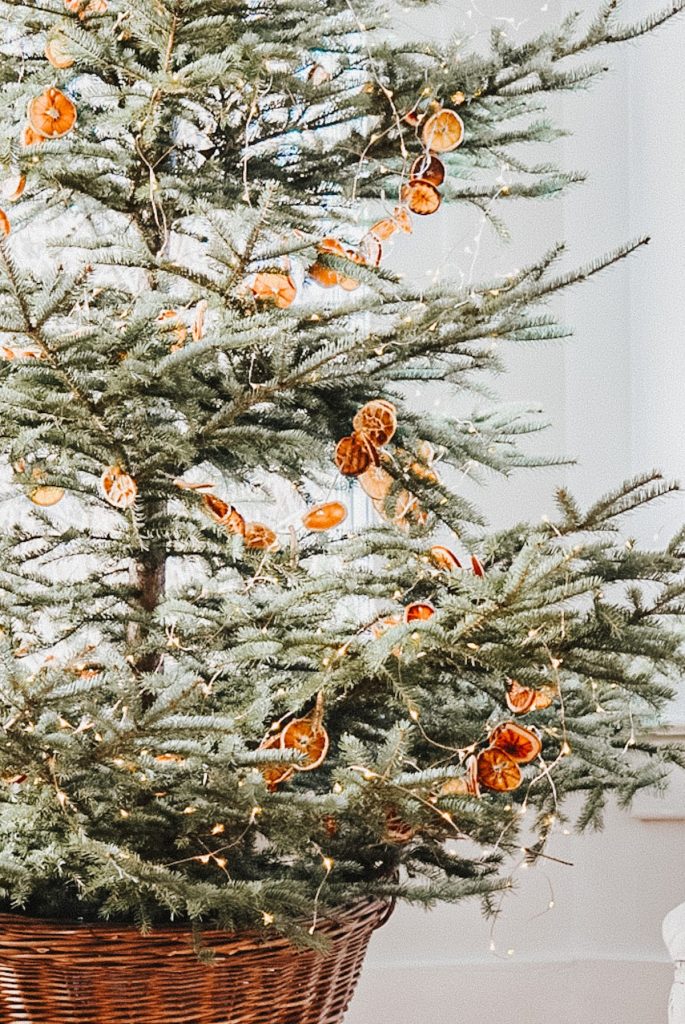
Orange Christmas garland can be used in many different ways during the holiday season. Hang it over an archway, across a fireplace mantle, in a window, or even on your Christmas tree. Anywhere the sun can hit it is perfect as orange garland resembles stained glass when the light shines through.
Dried citrus garland is a wonderful multi-season decoration that can be used to transition from one season to the next.
Hang it up as early as harvest in the fall for a lovely natural touch to your fall decor. The bright orange color is beautiful with the fall colors. This garland blends so well as you transition from fall to winter.
Keep it throughout the Christmas season as a lovely touch of Scandinavian Christmas decor. It makes a beautiful garland wrapped around a minimal Christmas tree. The orange color looks so perfect against the fresh evergreen.
Then, leave your garland up right into the New Year as non-Christmas winter decorations. Orange garland will bring a beautiful pop of color and warmth this time of the year when the palette is more neutral and the days are cold.
Are you looking just to make ornaments and not the garland? See my full tutorial on how to make dried orange slices.
Equipment Required
- Oven
- Dehydrator or Air Fryer
Supplies for Dried Orange Garland
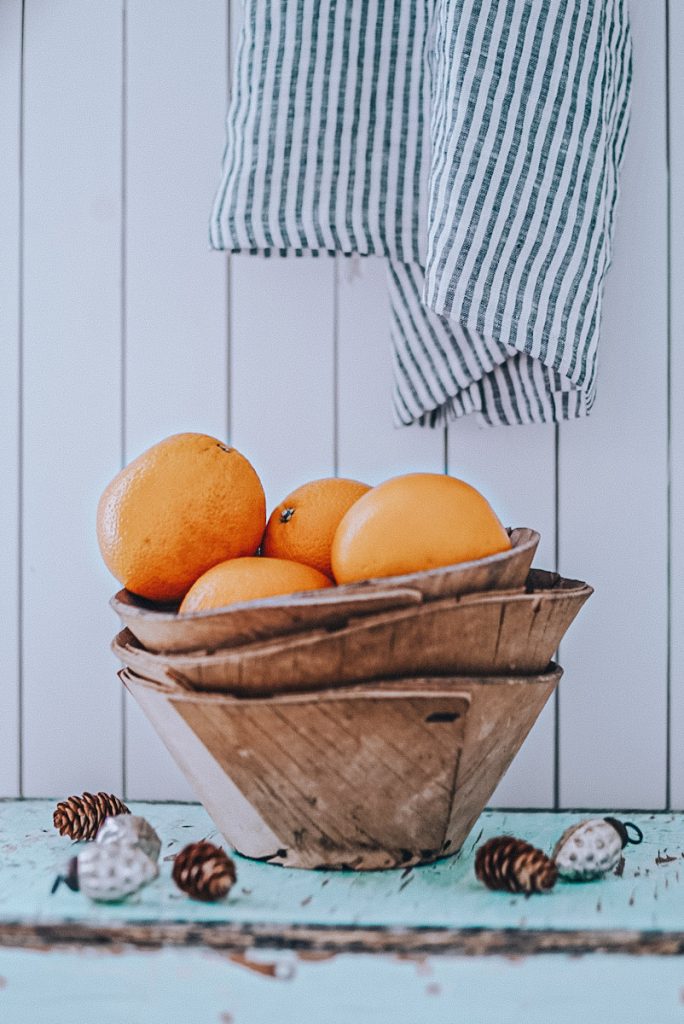
- 4-6 Fresh Oranges – It is essential to find unblemished oranges. Any marks that show on the outside of the fresh oranges will also show on the dried oranges in the garland.
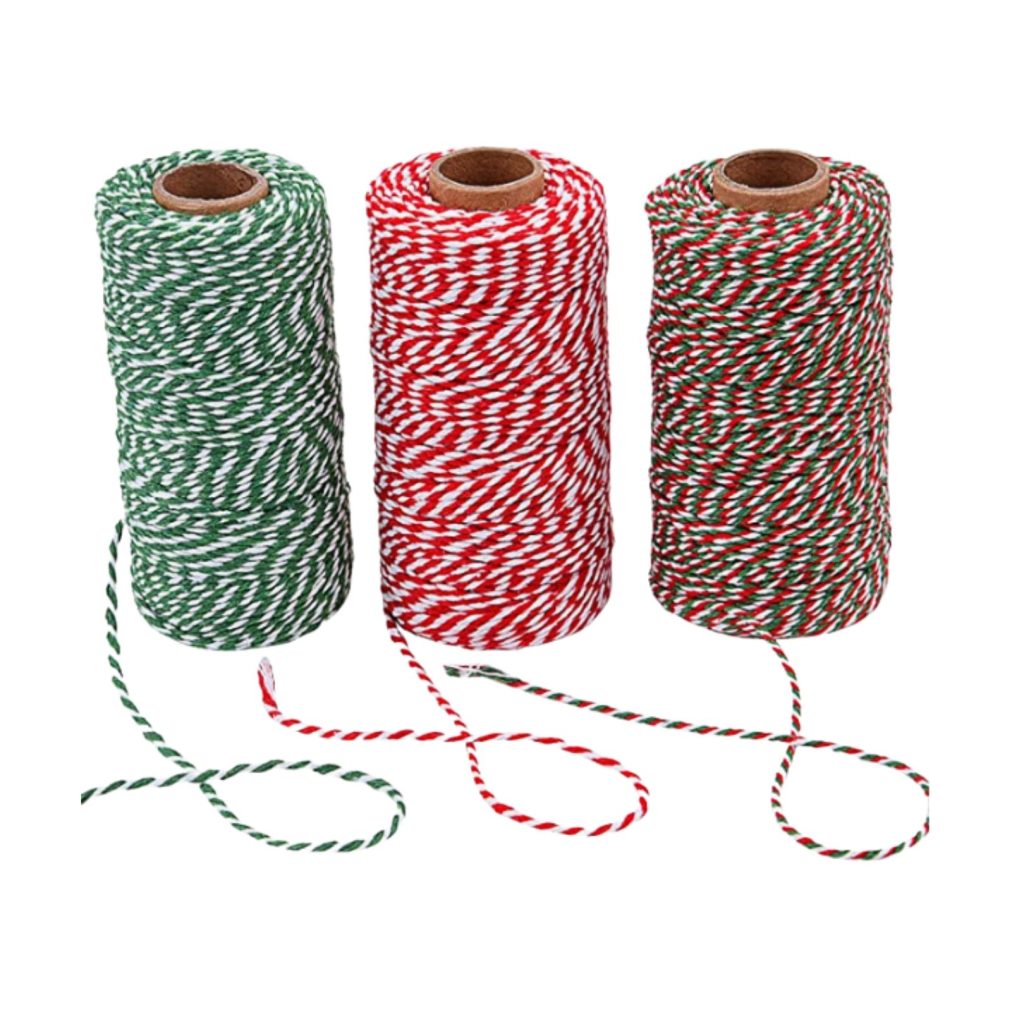
- Twine, fishing line, ribbon, or string – This depends on the look you want for your garland; make sure you choose something durable.
- Parchment Paper – Wax paper will work for this, too.
- Cookie Tray – Large sizes are best as you will be making a large number of dried oranges for garland
- Cookie Drying Rack – Any wire racks will work.
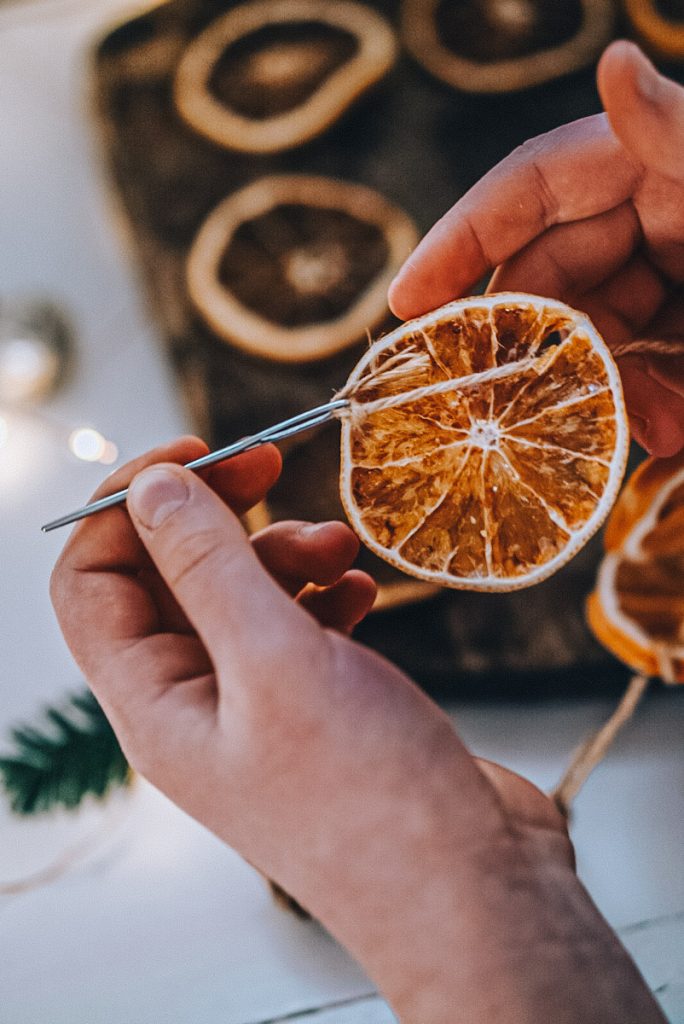
- Large Needle – A larger needle is best for durability and to ensure the twine or string will thread through the hole the needle makes in the orange.
- Sharp knife
- Paper towel
How to Make Dried Orange Garland
In the Oven
- Preheat the oven to 175 F or 225 C
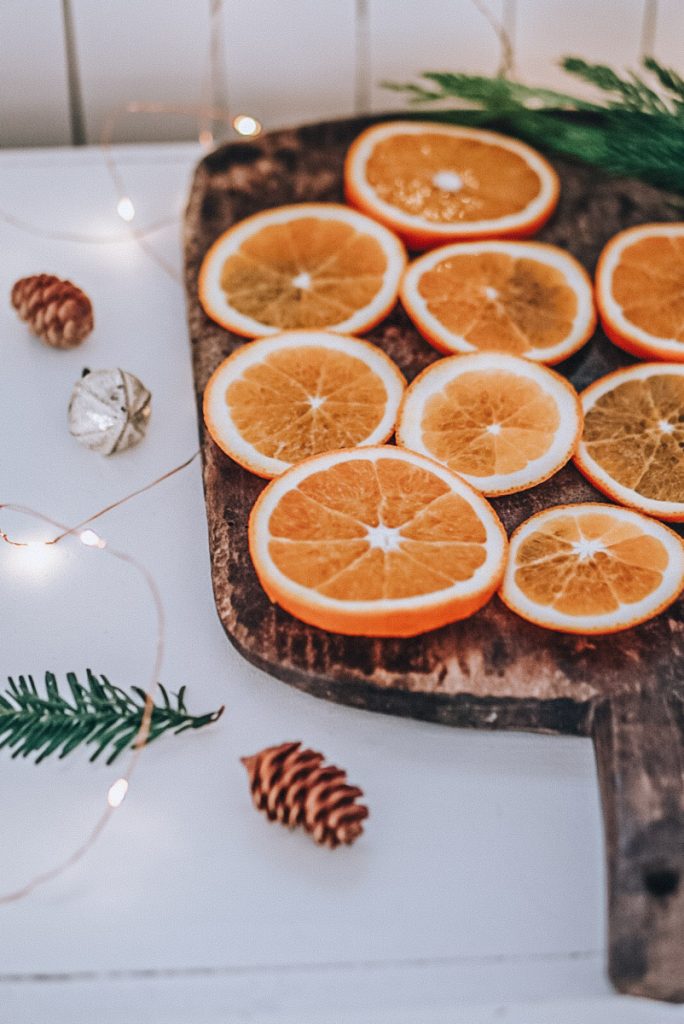
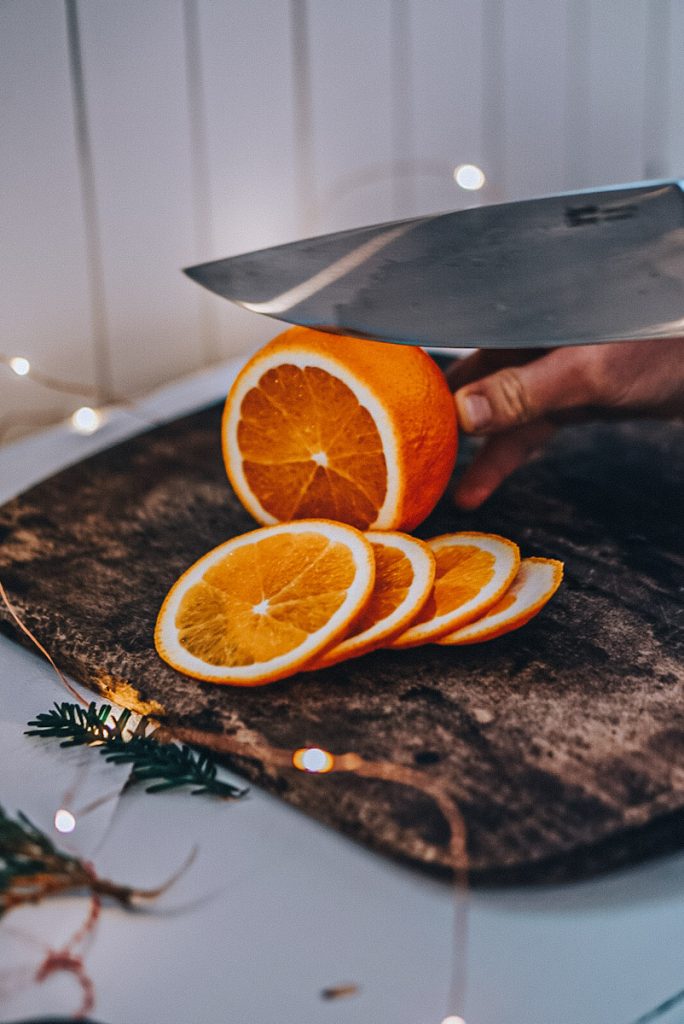
- Using a sharp knife, cut oranges into thin slices. You will want them to be at approx 1/8” thick.
- Line your cookie trays with parchment paper. Blot your sliced oranges prior to lining them on the parchment-lined baking sheet. Be sure to leave a bit of space between each slice.
- Place in the oven and bake for 4-6 hours. Keep an eye on them and flip the slices throughout the baking. If you leave them too long without flipping them, they may turn brown, burn or end up with grill marks from the oven.
- Once the oranges are completely dry, remove them from the oven and place them on the cooling rack. Let them cool completely.
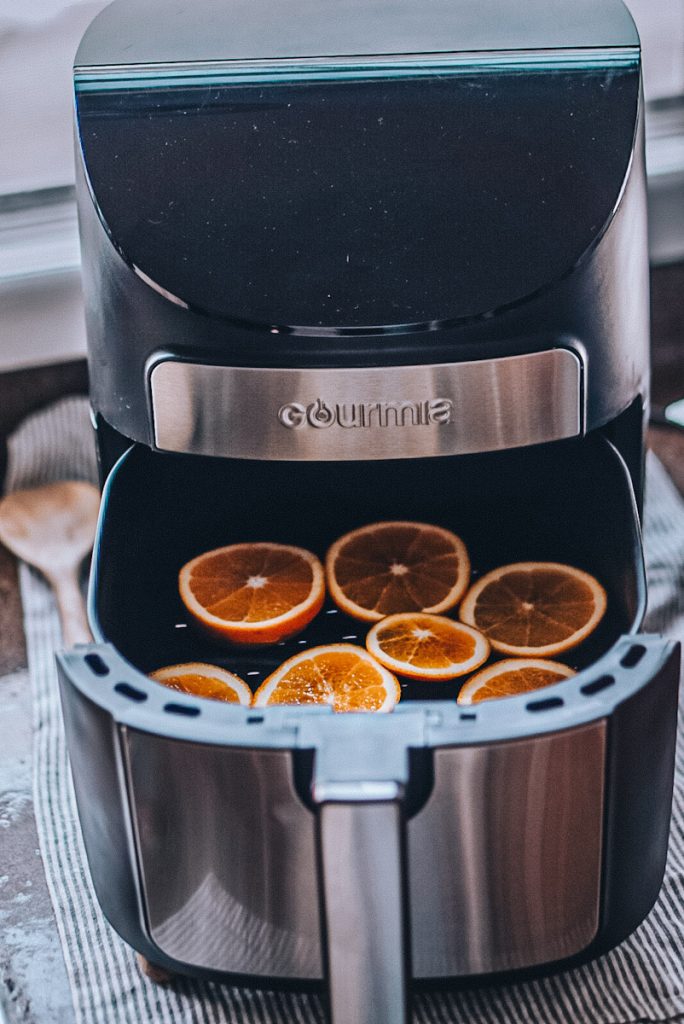
In the Dehydrator or Air Fryer
- Set the dehydrator or air fryer to 135 degrees F. The air fryer should have a setting for this.
- Cut oranges into slices. You will want them to be at least ⅛” thick.
- Arrange the citrus slices on dehydrator trays or the rack in the air fryer. Make sure to leave room for air circulation.
- Check the orange slices after 2 to 3 hours. You shouldn’t need to flip them when they are dried this way, as there is no risk of them turning brown or getting brown grill marks.
Stringing The Garland
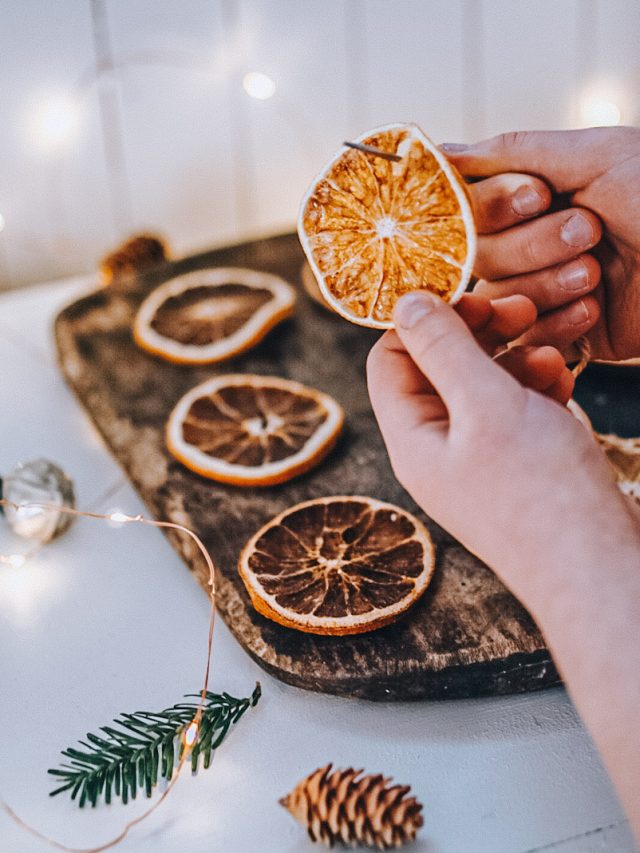
- Using the needle and thread, poke a hole through the dried flesh of the orange slice and string the oranges onto your desired twine, ribbon, or fishing line. Decide if you want large spaces between your oranges or would like to layer them on top of each other thickly. Do not poke through the rind.

In past years, I have also tied the orange slice in place on the twine to be sure it doesn’t move once it is hung up. Another option is to poke two holes in the flesh of the dried orange and sew in and out.
- Hang your beautiful orange garland somewhere in your home and enjoy!
Christmas Garland Options
Dried fruit garland is stunningly displayed with the slices only as a simple, minimal Christmas decoration. However, many different types of garland can be made using your dried orange slices. Try layering any of these added natural elements into your garland for a beautifully festive Christmas look:
- Cinnamon sticks
- Star Anise
- Evergreen sprigs
- Eucalyptus stems
- Cranberries
- Popcorn
- Pinecones
- Dried Apples
- Other types of dried citrus fruits
Try this fresh greenery garland tutorial for another beautiful type of garland at Christmas.
Storing Dried Orange Garland
Dried orange slices can be stored year after year. Simply place them in an airtight container that is kept in a cool, dry place. Make sure that they do not have any opportunity for moisture to get to them. Adding silica packs to the container during storage helps keep any moisture out as well.
Where to Buy Orange Garland
Maybe you don’t love to DIY or don’t want the hassle of making the dried orange slices. Or perhaps you are like me and always seem to be running short on time! There are many different places you can buy ready-made dried oranges and skip the “hard” part of this tutorial.
Make sure you peek at the B Vintage Style Shop for more beautiful Scandinavian-style Christmas decorations.
1lb bag, $16


Dried Apples and Orange Slices
10 oz bag, $18
3 roll set, $14
Tips and Tricks
- Other types of citrus fruit will work great for this easy DIY, too. Blood oranges, lemons, grapefruits, and limes make a festive garland. Try using both large and small oranges for a garland that is a bit unique.
- It is essential to find unblemished oranges. Any marks that show on the outside of the fresh oranges will also show on the dried oranges in the garland.
- Make sure you slice your oranges perpendicular to the ends of the orange. This will give your small orange triangles the appearance of stained glass once dried and hung in the sunshine.
- Slice all your oranges ⅛” thick. Keeping them the same width will ensure they all bake evenly, and the thinner-cut oranges will be more translucent once dry.
- If you are baking the oranges, make sure to continue to flip them so that they don’t burn or turn brown on one side.
- Be sure that your oranges are completely dry before you hang them. This will prevent them from molding or pesky fruit flies from coming into your home.
- To make sure the face of the orange shows when you hang your garland, tie a knot with your twine above the orange slice. Another option is to poke two holes in the flesh of the dried orange and sew in and out.
- Use a clear fishing line to string your dried oranges as a garland. This will make your orange slices look like they are floating.
Frequently Asked Questions
This is a personal preference; however, for the purpose of this garland, I would say no. Leaving the rind on the orange slice gives it the appearance of a picture frame, and the flesh looks like a stained glass window.
No. If you dry you’re oranges completely and correctly; you should not have trouble with any fruit flies.
Absolutely. Store it in an airtight container in a dry, cool place for the best results. It is vital that the orange slices are exposed to any moisture while being stored, so add a few silica packs to the container. They can last for three years or more if stored correctly.
Yes! This garland will make your whole home smell amazing! This is why I love to make fresh garlands each year instead of keeping them from season to season. You can also add a few drops of orange essential oil to keep it smelling fresh for the whole season.
When you finish it for the year, throw the slices in your compost instead of the garbage!
Hopefully, you have enjoyed these easy steps to make a DIY dried orange garland. Holiday crafts are the perfect way to make the holiday season a little more special. Don’t forget to Pin this simple garland tutorial for later!
More Holiday Inspiration
If you want another Christmas craft or easy project, try any of these:
Printable Dried Orange Garland Tutorial
A printable copy of this tutorial is available to my email subscribers. If you aren’t on my list, and would like to join, fill out the short form below, and the eBook will be sent directly to your inbox.
want to save this recipe?
Enter your email & I’ll send it to your inbox. Plus, get great new recipes from me every week!
By submitting this form, you consent to receive emails from B Vintage Style.

How To Make Dried Orange Garland
Equipment
- Oven
- Dehydrator or Air Fryer
Materials
- 4-6 Fresh Oranges
- Twine, fishing line, ribbon, or string
- Parchment Paper
- Cookie Tray
- Cookie Drying Rack
- Large Needle
- Sharp knife
- Paper towel
Instructions
In the Oven
- Preheat the oven to 175 F or 225 C
- Using a sharp knife, cut oranges into thin slices. You will want them to be at approx 1/8” thick.

- Line your cookie trays with parchment paper. Blot your sliced oranges prior to lining them on the parchment-lined baking sheet. Be sure to leave a bit of space between each slice.
- Place in the oven and bake for 4-6 hours.
- Once the oranges are completely dry, remove them from the oven and place them on the cooling rack. Let them cool completely.

In the Dehydrator
- Set the dehydrator or air fryer to 135 degrees F. The air fryer should have a setting for this.
- Cut oranges into slices. You will want them to be at least ⅛” thick.
- Arrange the citrus slices on dehydrator trays or on the rack in the air fryer.
- Check the orange slices after 2 to 3 hours.

Stringing The Garland
- Using the needle and thread, poke a hole through the dried flesh of the orange slice and string the oranges onto your desired twine, ribbon, or fishing line.
- Hang your beautiful orange garland somewhere in your home and enjoy!

Notes
- Other types of citrus fruit will work great for this easy DIY too. Blood oranges, lemons, grapefruits, and limes all make a festive garland. Try using both large and small oranges for a garland that is a bit unique.
- It is important to find unblemished oranges. Any marks that show on the outside of the fresh oranges, will also show on the dried oranges in the garland.
- Make sure you slice your oranges perpendicular to the ends of the orange. This will give your orange small triangles that offer the appearance of stained glass once dried and hung in the sunshine.
- Slice all your oranges ⅛” thick. Keep them the same width will ensure they all bake evenly and the thinner-cut oranges will be more translucent once dry.
- If you are baking the oranges, make sure to continue to flip them so that they don’t burn or turn brown on one side.
- Be sure that your oranges are completely dry before you hang them. This will prevent them from molding or from pesky fruit flies from coming into your home.
- To make sure the face of the orange shows when you hang your garland, tie a knot with your twine above the orange slice. Another option is to poke two holes in the flesh of the dried orange and sew in and out.
- Use a clear fishing line to string your dried oranges as a garland. This will make your orange slices look like they are floating.