Home » Vintage Home Decor » home improvement projects » How to Make a Shiplap Ceiling

How to Make a Shiplap Ceiling

This post may contain affiliate links. Please read our full Disclosure Policy.

Do you want to cover up an old, outdated ceiling? Perhaps you are building new, but just love the look of a shiplap ceiling or cottage feel. This easy, DIY process is great for even a beginner DIYer. Just grab a partner and read all the tips and tricks below on how to get the stunning shiplap ceiling. 

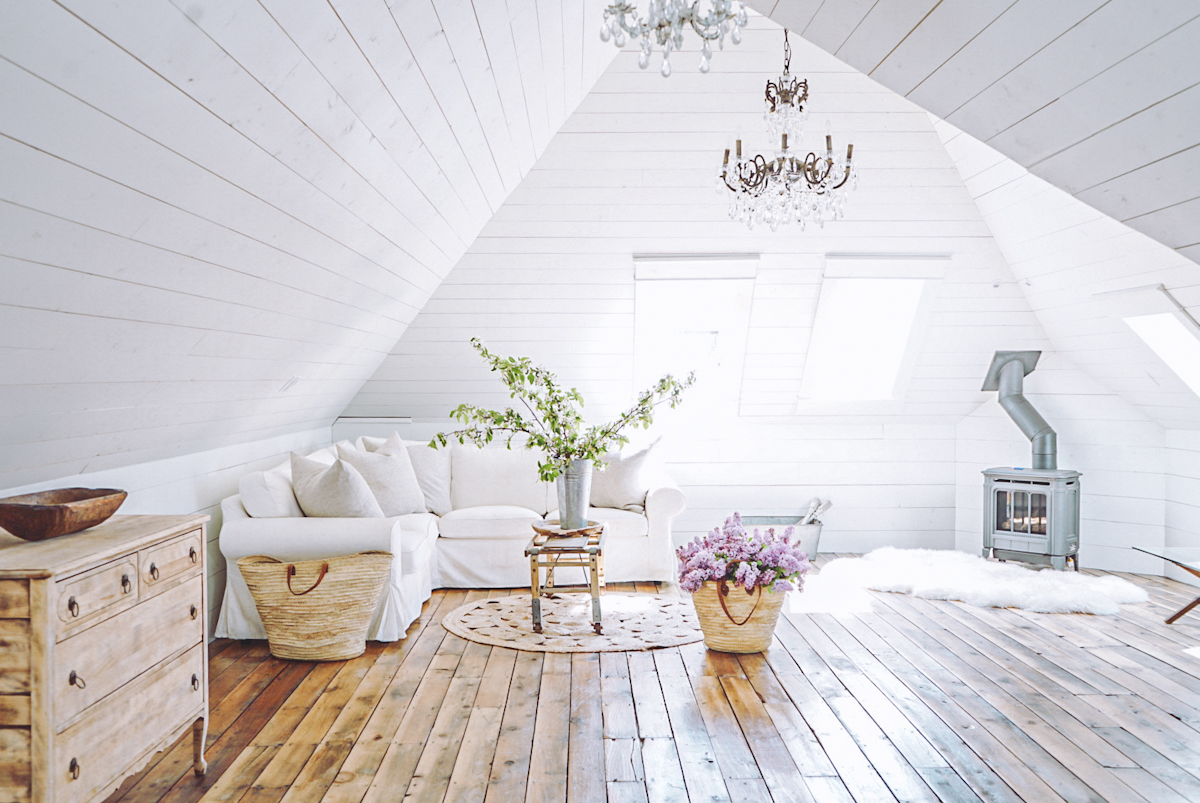
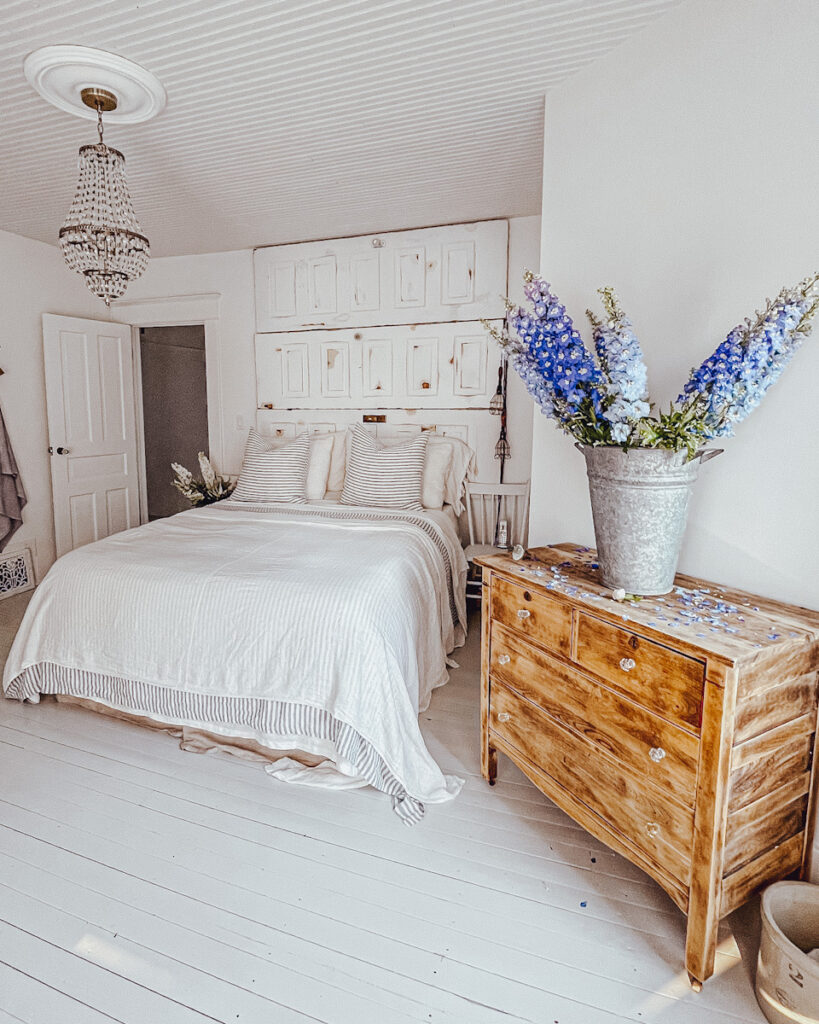
We have slowly updated all the ceilings in our 1903 Victorian house to shiplap over the last six years. This is the same style of shipwrap that we put out in our tiny house cabin shed as well. I love the look and feel it gives each space that I’ve added it to.

Types of  Shiplap for a Ceiling 

There are so many types of shiplap on the market, sometimes it can be overwhelming trying to decide which type to use. If you are unsure on what type you want to use for the wood tongue and groove ceiling, make sure to read this post on how to choose shiplap for your home first. Types of shiplap that can be used for a ceiling are 

  • Pre-Made Tongue and Groove Shiplap
  • Milled Shiplap
  • MDF Shiplap Planks
  • Plywood Planks
  • Cottage Grade Pre-Made Planks
Shop My Home

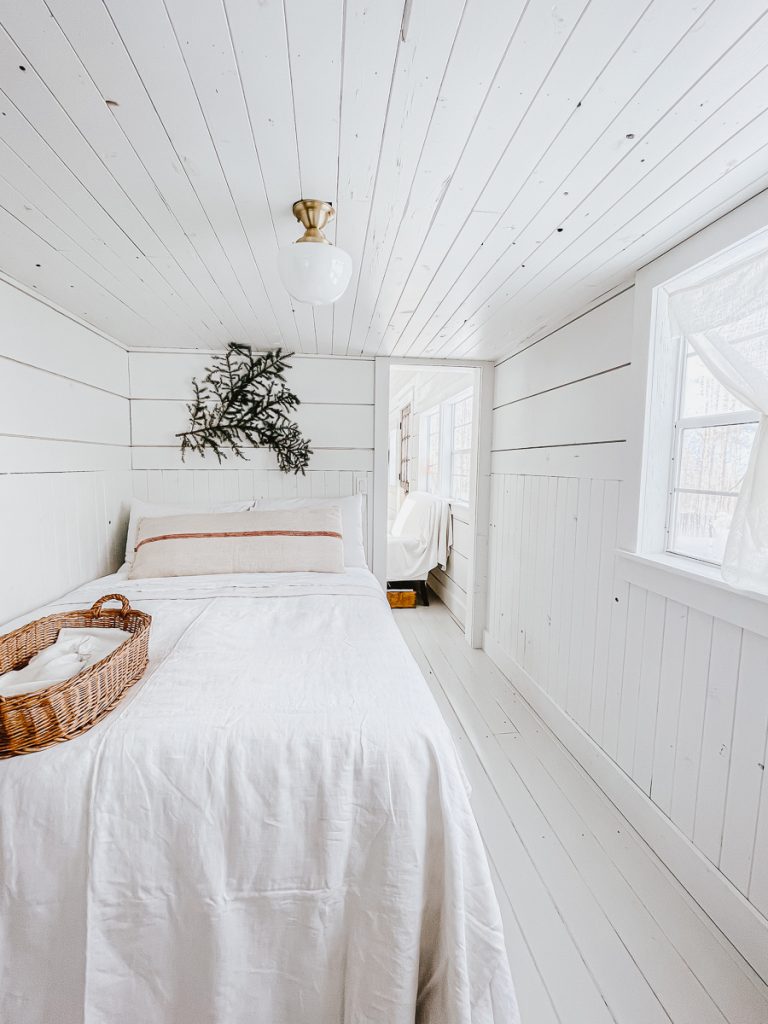
For this tutorial, we will be using cottage grade pre-made planking! You can purchase this product in different woods like pine, spruce, fir and cedar. If you are choosing to paint over it like I do, I would recommend using a pine or spruce product as it is the most cost effective and it doesn’t bleed through the paint or stain the way that cedar or fir wood does. I have also milled this myself in the past as there was a shortage of product during the pandemic. 

little girls room in a loft cabin

Covering Up Popcorn Ceiling

When I first bought this big historic house, there was so much work to be done. It was almost overwhelming the kind of shape that the house was in. For almost three full years, Patrick and I worked night and day to make this house the way we had always dreamed. Room by room, we gave the old girl a facelift. Now, we have lived here for almost eight years, the renovations that are left are simple upgrades but one of the things that drive both of us crazy is a 1970s popcorn ceiling. In our previous home, we tried to scrape the popcorn off of the ceiling. It was an awful experience! So this time around, we decided it would be a much better idea to cover it up! Not to mention I loved the look and detail of a shiplap ceiling. Although I used this process to cover up the 

cottage grade shiplap planks that were milled and mitred

Using Shiplap for a Ceiling

Although planking a ceiling with shiplap is a great way to cover up an old ceiling or outdated popcorn ceiling, it can also be put into a new space. It is important to plan for this type of ceiling by adding the appropriate strapping to the the ceiling joists if necessary. 

Shop For This Shiplap Ceiling DIY

{font-size:25px;font-style:normal;}.wp-block-kadence-advancedheading.kt-adv-heading88666_b451a0-30 mark.kt-highlight, .wp-block-kadence-advancedheading.kt-adv-heading88666_b451a0-30[data-kb-block="kb-adv-heading88666_b451a0-30"] mark.kt-highlight{font-style:normal;color:#f76a0c;-webkit-box-decoration-break:clone;box-decoration-break:clone;padding-top:0px;padding-right:0px;padding-bottom:0px;padding-left:0px;}.wp-block-kadence-advancedheading.kt-adv-heading88666_b451a0-30 img.kb-inline-image, .wp-block-kadence-advancedheading.kt-adv-heading88666_b451a0-30[data-kb-block="kb-adv-heading88666_b451a0-30"] img.kb-inline-image{width:150px;vertical-align:baseline;}

want to save this recipe?

Enter your email & I’ll send it to your inbox. Plus, get great new recipes from me every week!

Save Recipe Form

By submitting this form, you consent to receive emails from B Vintage Style.

shiplap ceiling pinterest
Print
No ratings yet

How to Install a Shiplap Ceiling

Do you want to cover outdated popcorn ceilings and do you love the look of shiplap? Use this tutorial to create a beautiful shiplap ceiling.
Prep Time6 hours
Active Time8 hours
Total Time14 hours
Course: diy projects
Keyword: ceiling, how to install a shiplap ceiling, how to plank a ceiling, planked ceiling, shiplap ceiling, tongue and groove ceiling
Yield: 1
Cost: 200 +

Equipment

  • Mitre Saw
  • Nail Gun
  • Measuring Tape
  • Pencil
  • Ladder
  • Stud Finder
  • Chalk Line

Materials

  • 5/16 – 1/4 ” Cottage Grade Pine Planking
  • Liquid Nails
  • Dap or Caulking
  • Sandpaper
  • Paint or Wood Stain

Instructions

  • Before you begin, you will need to find your ceiling joists and which way they run, because you will be nailing the planks into those joints. Whichever way the joists run, you will nail your planks in the opposite direction, across the joists. You can find the joists by using a stud finder and marking them on the ceiling.
  • Use a chalk line to mark the joints so that you know exactly where to place your nails. For us, it was much easier as the ceiling is lath and plaster which is extremely strong so we skipped the above steps.
  • Place a plank and using the nail gun, secure it to the ceiling. You will want to start on one side of the room and work your way over. Make sure you are making adjustments as no room is completely square so you need to keep your boards tight together to prevent a slanted line at the end.
  • The planks are tongue and groove, so simply connect them together and then add a nail every 12”’s or so.
  • Stagger your planks as you install them. It is a more attractive look if you stagger the seams on each row by beginning every other row with a 4′ or some other different size board.
  • Use Dap or caulking to hide any nail holes or imperfections along the seams of the walls.
  • Stain or paint the planking before or after installation. I have done it both ways but prefer to paint the primer and first stain coat BEFORE installation and then finish with the final coat of stain AFTER when the panels are up.