This post may contain affiliate links. Please read our full Disclosure Policy.
Building an outdoor wood stove fireplace is truly an amazing expansion for any backyard living space. A great lounge area and dining space are wonderful to have in those summertime months and the addition of an outdoor wood-burning fireplace or stove can be the perfect addition.
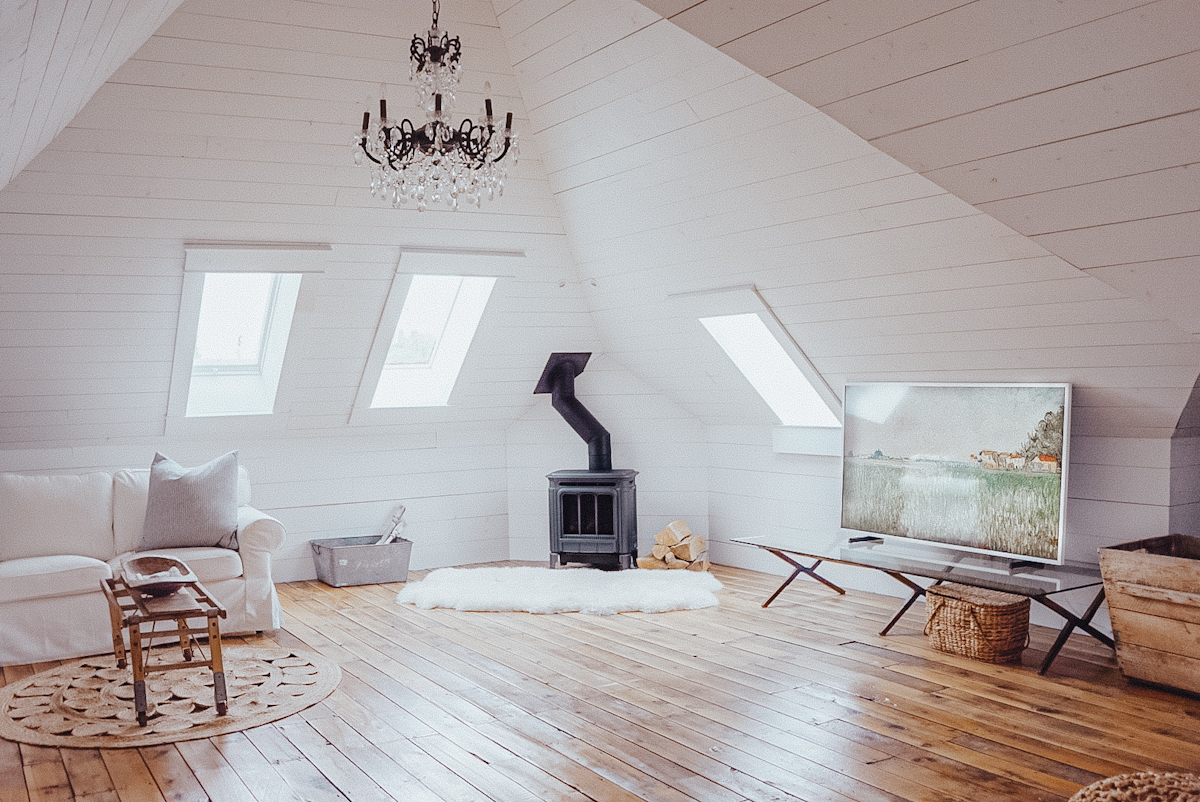
I have had a backyard vision for this house ever since we first moved in and am so happy that we are finally to the point where it is all coming together.
This years project was to build a beautiful DIY outdoor wood burning fireplace and I partnered with Rust-oleum for this project! I LOVE how this turned out and wanted to put together a step by step guide on how I did it. Please take a peek below at my 6 Step Guide to an Outdoor Wood Burning Fireplace.

Why We Love This Project
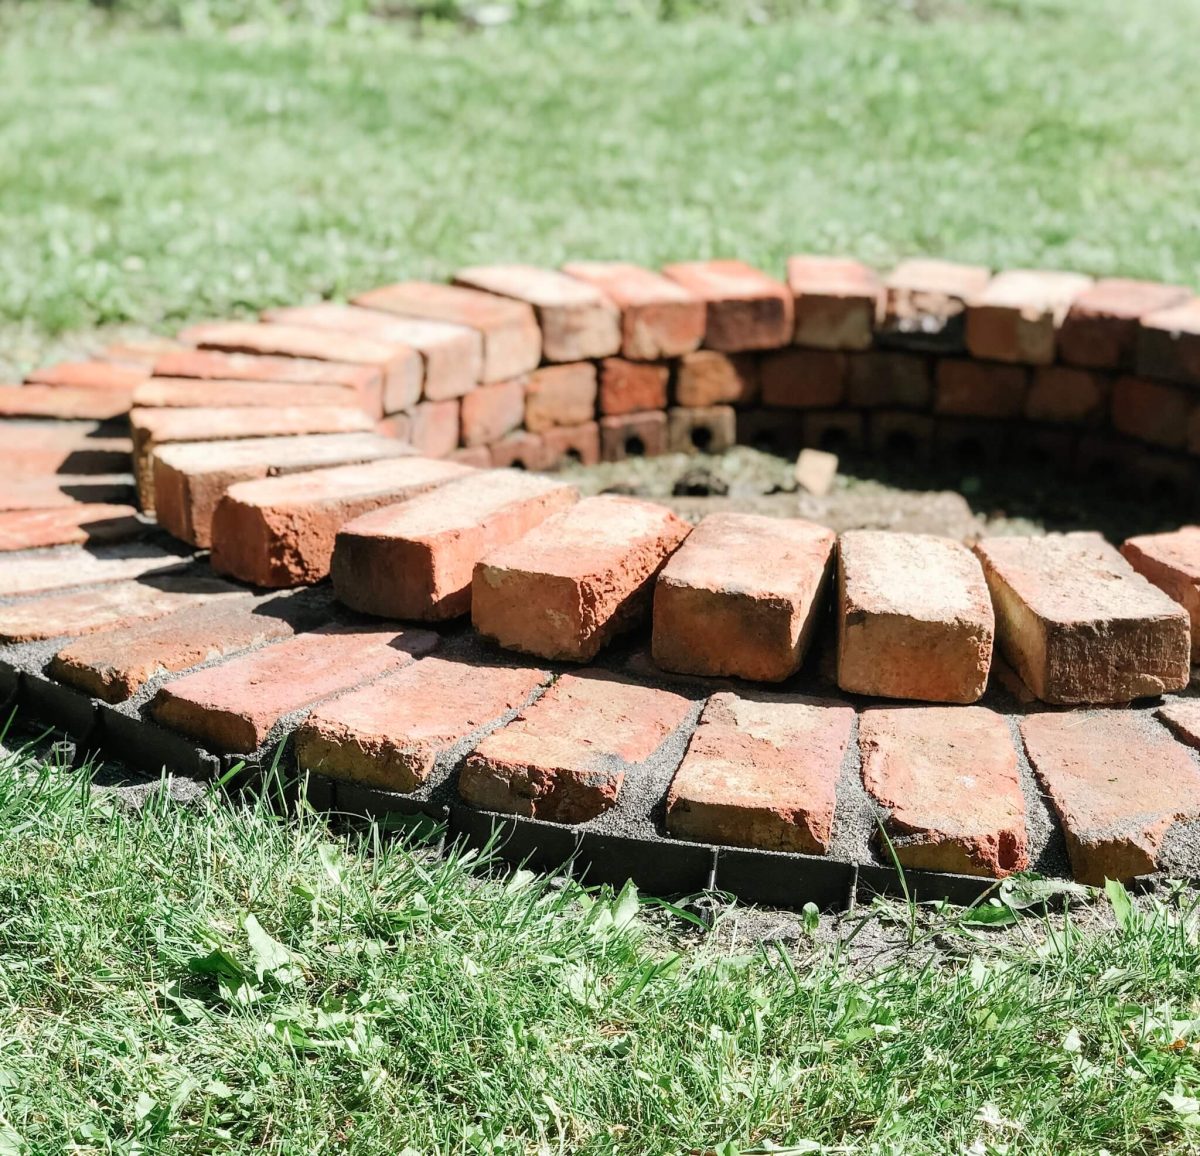
This big house has been a labour of love as so many of you know. Every year we try and take on a new outdoor project at the house in the summertime. Last year, we added this beautiful salvaged brick patio pad to the backyard, and this year we wanted to add an outdoor fireplace to the mix.
Initially, the idea was to build a large stone, free-standing fireplace. However, we didn’t plan things out very well. A portion of the fence would need to be removed, and a concrete pad would need to be installed over top of the just-finished brick patio. I had to come up with a different idea and decided to go with an outdoor wood burning stove.
There are many reasons why people love having an outdoor wood burning stove fireplace in their backyard.
- Ambiance: An outdoor wood burning stove fireplace creates a cozy and inviting atmosphere. It’s the perfect place to gather with friends and family, roast marshmallows, and enjoy the warmth of the fire.
- Cooking: Many outdoor wood burning stoves come with a built-in grill or oven, making it easy to cook meals while enjoying the outdoors. This is especially great for those who love to entertain and host outdoor parties.
- Cost-effective: Wood is a renewable resource and is often cheaper than other fuel sources. This means that an outdoor wood burning stove fireplace can be a cost-effective way to heat your outdoor living space.
- Eco-friendly: Burning wood produces fewer greenhouse gases than other fuel sources, making it a more eco-friendly choice. Additionally, using a wood burning stove can help reduce your carbon footprint.

Upcycling An Antique Stove
When we bought the house it had been a rental for close to 50 years. I had high hopes of finding some forgotten goodies in the attic or basement but truly came up empty handed. The one hidden gem however, that we did find left stuffed in the corner of the garage, was this stunning, antique wood burning stove!
We figured it would have been the original stove from the kitchen of the house so we held onto it. After thinking long and hard about what to put as an outdoor fireplace, I decided it would be a beautiful, creative addition to our space!
What To Look For In An Outdoor Wood Stove
Using an antique wood stove as an outdoor wood burning stove fireplace can be a great way to add a unique and charming touch to your outdoor living space. Here are a few things to consider if you’re thinking about using an antique wood stove as an outdoor fireplace:
Safety
Make sure the antique wood stove is in good condition and has been properly restored before using it as an outdoor fireplace. Check for any cracks or damage that could pose a safety risk.
Ventilation
An outdoor wood-burning stove fireplace requires proper ventilation to prevent smoke and fumes from entering your home or neighboring homes. Make sure the antique wood stove is properly vented and that the chimney is in good condition.
Fuel
Antique wood stoves may not be as efficient as modern wood stoves, so you may need to use more wood to achieve the desired level of heat. Make sure you have a good supply of wood on hand.
Maintenance
Antique wood stoves require regular maintenance to keep them in good condition. Make sure you clean the stove regularly and check for any signs of wear and tear.
Durability
You don’t want to have to haul it in and out or move it for the winter months so it needs to be able to hold up in the Canadian winters. Not to mention the rain and hail storms through out those summer months.
Practicality
You can cook on it. I love that we can roast marshmallows and hotdogs on it! So look for something that you can enjoy with family and friends Our family cooks a lot of seafood so this is a great alternative to cooking it indoors as it doubles as a stove
Appearance & Aesthetics
It needs to be a place of comfort but also something you love the look of. That is what will make all the difference and will make your family want to spend a lot of time using it!
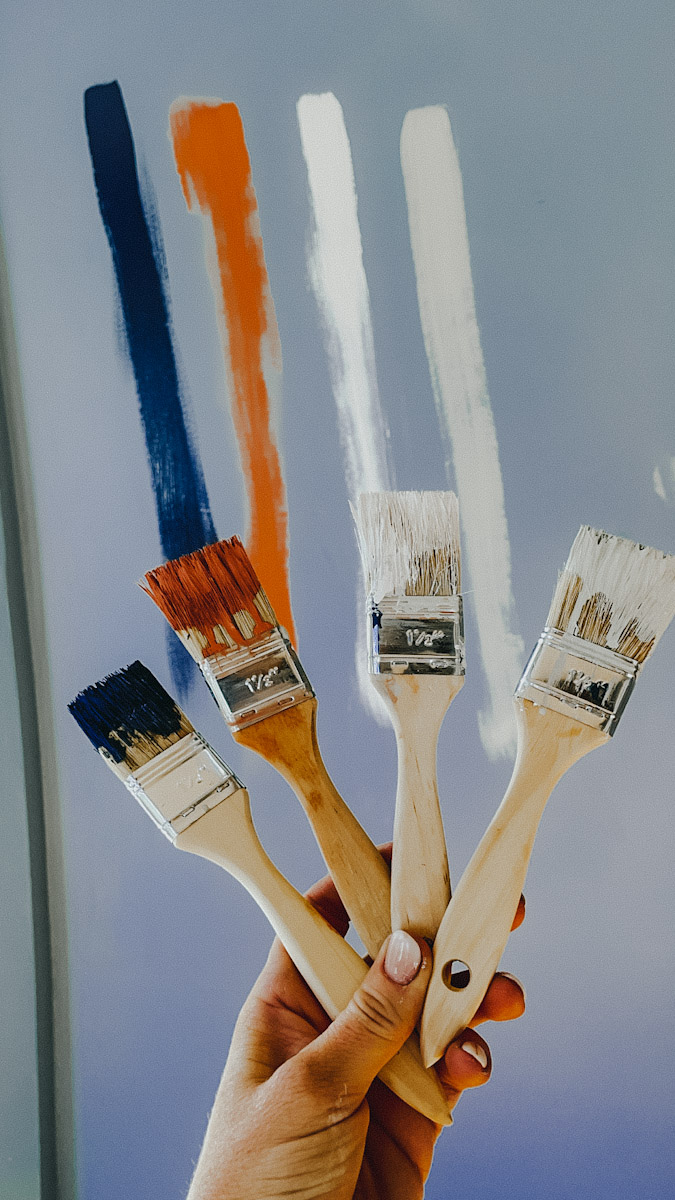
High Heat Spray Paint
High heat spray paint is a type of paint designed to withstand high temperatures. It is commonly used on surfaces that are exposed to heat, such as grills, fireplaces, and exhaust systems. Here are some pros and cons of using high heat spray paint:
Pros:
- Heat resistance: High heat spray paint can withstand temperatures up to 1200°F, making it ideal for use on surfaces that are exposed to high heat.
- Durability: High heat spray paint is designed to be durable and long-lasting, even in harsh outdoor conditions.
- Easy application: High heat spray paint is easy to apply and can be used on a variety of surfaces, including metal, ceramic, and glass.
- Wide range of colors: High heat spray paint is available in a wide range of colors, allowing you to choose a color that matches your décor or personal style.
Cons:
- Limited coverage: High heat spray paint may not cover as much surface area as regular spray paint, meaning you may need to use more cans to cover a large area.
- Limited finish options: High heat spray paint is typically only available in a matte or satin finish, which may not be ideal for all applications.
- Longer drying time: High heat spray paint may take longer to dry than regular spray paint, which can be frustrating if you need to use the surface right away.
- Toxic fumes: High heat spray paint can emit toxic fumes, so it’s important to use it in a well-ventilated area and wear protective gear, such as a respirator mask and gloves.
I am so impressed with how well the Rust-oleum High Heat spray paint worked on this fireplace project. A few of the most important features I needed out of this paint were to have it be weather resistant, have good coverage and be able to stand up to extreme temperatures. So far, I can add a check mark beside each and every one of these.
The coverage was great and being an outdoor product, I should be good for a few years without needing to touch it up! The paint does warn to not to have it exposed to direct fire or heat. However because it is on the outside of the piece it is totally fine.
I am very excited to see how well it holds up over time, going with the satin finish it should help with the longevity of the paint as opposed to going over it with a high shine or glossy product.

Building A Outdoor Wood Fireplace
I love the patina and rusted look it has but I also know that if I leave it as is, it will just end up full of holes from being unprotected in the weather and elements. The stove also needed a pipe for proper ventilation.
I am always up for a DIY challenge, so this project was right up my alley. This project was probably about a 6 on a scale of 1-10 for difficulty. The hardest part for sure was getting the chimney stack to fit properly.
Materials
- Old wood burning stove
- 3 foot piece of 6″dia black stove pipe
- 6” dia black stove pipe elbow
- Custom-built steel piping for the base piece
- Painters Tape
- Newspaper or Painters Paper
- 120 Grit Sandpaper
- Paper Towel
- 6 Cans of Rust-oleum High Heat spray paint in Satin Black finish

Instructions
Preparing the Stove
- Measure the stack hole and have your local welding shop custom build an attachable piece of steel to use on the top of the stove. Use a 6” diameter pipe so that you can fit a standard stove pipe into the top when it is finished.
- Attach the 3’ stove pipe to the custom steel pipe fitting. You may need to use some tin snips to make this fit properly or take it to the welding shop. You will also want to add the 6” elbow as well at this point.

- Tape off any areas that aren’t to be painted, using painter’s tape and a paper roll or newspaper. I needed to tape off the front of the stove as it was chrome and I wanted it to stay that way.

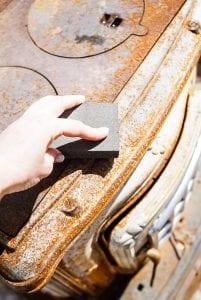
- Clean off any loose rust and any flaking parts to the piece. I used a 120 grit piece of sandpaper to do this step. You don’t need to get down to bare, shiny metal. Just clean off the flakes and powdery surface rust that prevent paint from adhering. However, badly rusted metal areas will need more prep work. It’s amazing what a little elbow grease and a coat of paint can do!
- Wipe the area clean using a damp cloth and allow it to dry completely before beginning to paint the area.

Painting the Stove
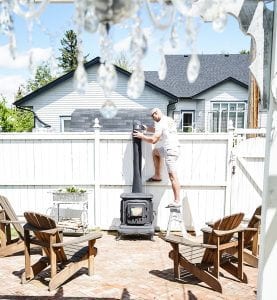
- Paint! You can now begin the spray painting using the Rust-oleum High Heat Outdoor rust-proof paint. Hold the can approximately 6-12” away from the piece when spraying to avoid drips.
To avoid the risk of pooling or running, don’t spray too close to the piece. If this does happen, blot the drip with a damp cloth and allow it to dry completely before you paint a second coat on the area.

Allow the whole piece to dry completely in between coats. I did three coats for my fireplace as I wanted to have really good coverage on it.
I love that the fireplace has a history with the house! It makes it extra special for our family to enjoy!
Before and After
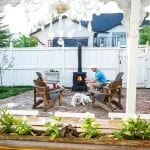
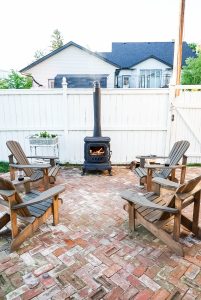
I am SO happy with how this amazing outdoor wood burning fireplace turned out! It is such a beautiful addition to our back yard and I love how creative and unique it is!

I also love having a tiny piece of history from the original house being recycled and reused somewhere on the property! It burns really well and puts off a lot of heat considering it is not an open unit!
The kids love being able to roast marshmallows and hotdogs in it too! The view from my kitchen sink looks right out at this area so it also gives such a beautiful space to look at. Now all there is to do is pour a glass of wine, sit back and enjoy!
Tips and Tricks A DIY Outdoor Wood Stove
Building a DIY outdoor wood stove fireplace can be a fun and rewarding project. If you’re considering building a DIY outdoor wood stove fireplace, here are some tips and tricks to help you get started:
- Choose the right location: Make sure you choose a location that is away from any flammable materials, such as trees or bushes. The area should also be level and have good drainage.
- Use the right materials: Choose materials that are durable and can withstand outdoor conditions, like high heat spray paint.
- Follow building codes: Check with your local building codes to make sure you are following all the necessary regulations. This will ensure that your DIY outdoor wood stove fireplace is safe and legal.
- Consider insulation: Insulating the firebox and chimney can help improve the efficiency of your outdoor wood stove fireplace and reduce the amount of smoke produced.
- Have a fire extinguisher nearby: Make sure you have a fire extinguisher nearby in case of an emergency.
- Test the draft: Before lighting a fire, test the draft of the chimney to make sure it’s working properly. This will help prevent smoke from entering your home or neighboring homes.
Just make sure you take the necessary safety precautions and follow these tips and tricks to ensure a successful outcome.

More Outdoor Projects
You can also check out our post from earlier this year to get some inspiration and our 5 Best Tips on Decorating your Outdoor Living Spaces. There is nothing better than coming home after a long day, putting your feet up and enjoying a beautiful outdoor oasis with your family!
Here are a few other outdoor projects we have done over the years:

Check out the feature done on Rust-oleum
Frequently Asked
Yes, but make sure it is made of durable materials such as cast iron or stainless steel. It should also have a weather-resistant finish to protect it from the elements.
This is dependent on the type of fireplace, however, a wood stove should have a chimney. It’s important to ensure that the outdoor wood-burning stove is properly installed and vented to prevent smoke and fumes from entering your home or neighboring homes. The stove should be placed in a safe location away from any flammable materials, such as trees or bushes.
want to save this recipe?
Enter your email & I’ll send it to your inbox. Plus, get great new recipes from me every week!
By submitting this form, you consent to receive emails from B Vintage Style.
DIY Outdoor Wood Burning Stove Fireplace
Equipment
- 1 Painters Tape
- 1 Newspaper or Painters Paper
- 1 120 Grit Sandpaper
- 1 Paper Towel
Materials
- 1 unit wood burning stove black
- 1 piece 3 foot piece of 6"dia stove pipe black
- 1 piece 6” dia stove pipe elbow black
- 1 piece Custom-built steel piping for the base piece
- 6 cans Rust-oleum High Heat spray paint in Satin Black finish
Instructions
- Measure the stack hole and have your local welding shop custom build an attachable piece of steel to use on the top of the stove.

- Attach the 3’ stove pipe to the custom steel pipe fitting and elbow for venting.

- Tape off any areas that aren't to be painted, using painter's tape and a paper roll or newspaper.
- Clean off any loose rust and any flaking parts of the piece using sandpaper.
- Wipe the area clean using a damp cloth and allow it to dry completely before beginning to paint the area.
- Begin spray painting. Hold the can approximately 6-12” away from the piece when spraying to avoid drips.

- Allow to dry completely and repeat the painting process until you achieve the desired appearance.


Hi I was wondering how the wood stove held up in the elements over the winter? We have a stove we need to repurpose and would love to try this!
It’s actually been really great even with the Alberta winters and leaving it outside. I have a slight amount of touch ups each year with the heat resistant paint but otherwise it’s been great! I would do it again for sure.