This post may contain affiliate links. Please read our full Disclosure Policy.
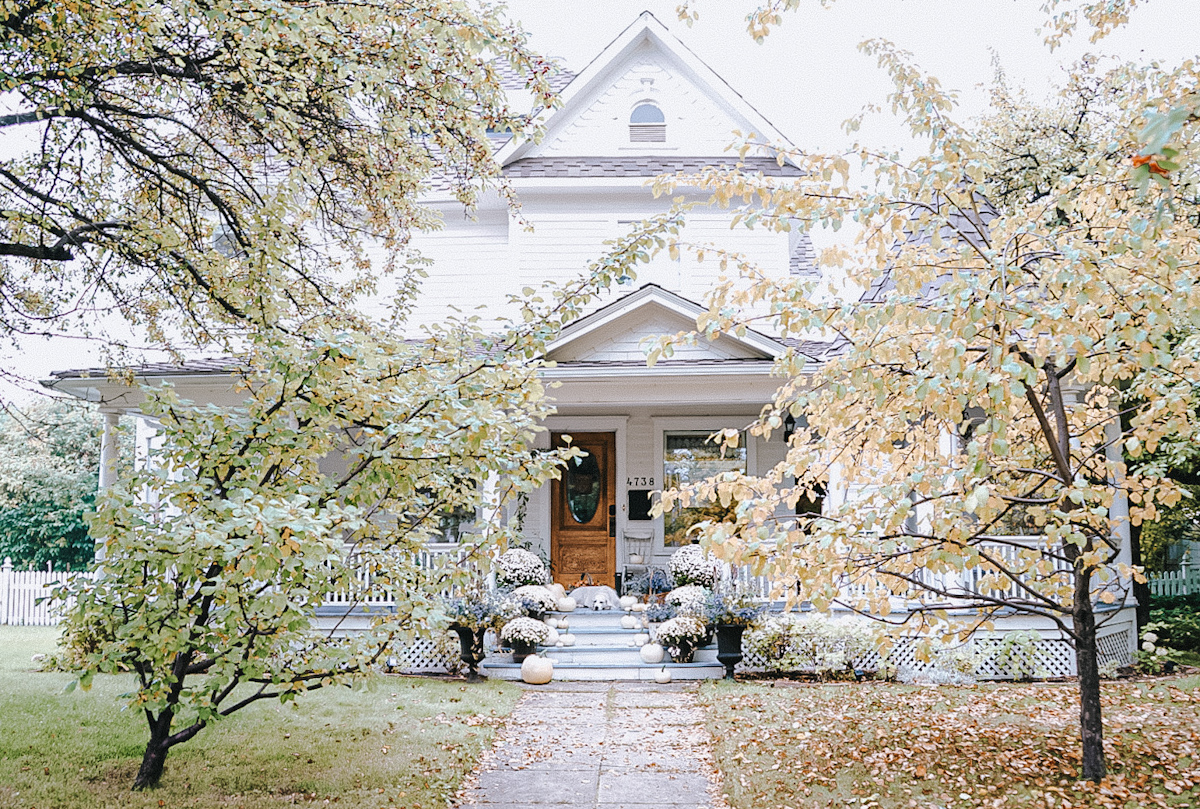
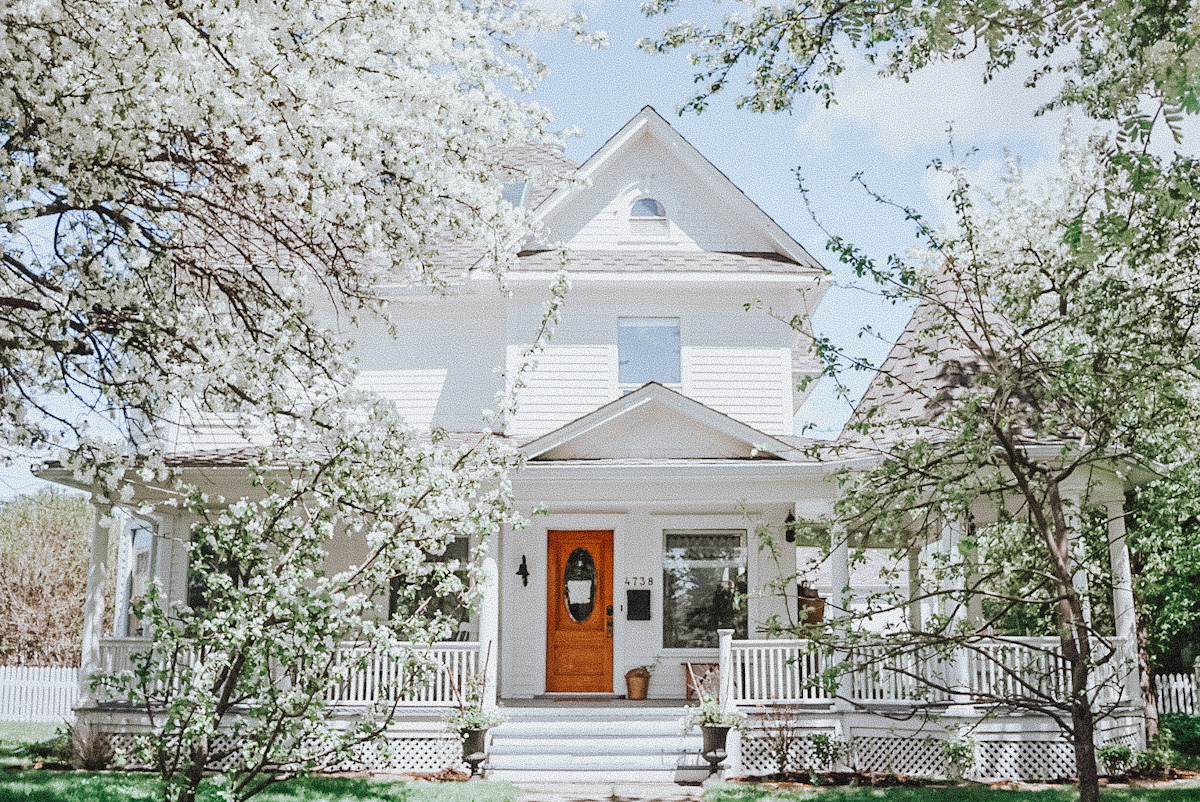
Figuring out how to finish an attic in an old house is not for the faint of heart, but it is one of the most rewarding renovations we have ever tackled. When we bought our 1903 Queen Anne Victorian, the attic was nothing more than a dusty, forgotten storage space.

It was full of garbage left behind by renters over the last 50 years. There was an old bathtub, a sledgehammered brick chimney, and evidence that someone had even raised rabbits up there!
Today, it is a cozy family room and my office space, and it remains one of the best spaces we have completed to date. If you are wondering how to finish an attic in an old house, this 7-step guide walks you through exactly what we did to transform our space.
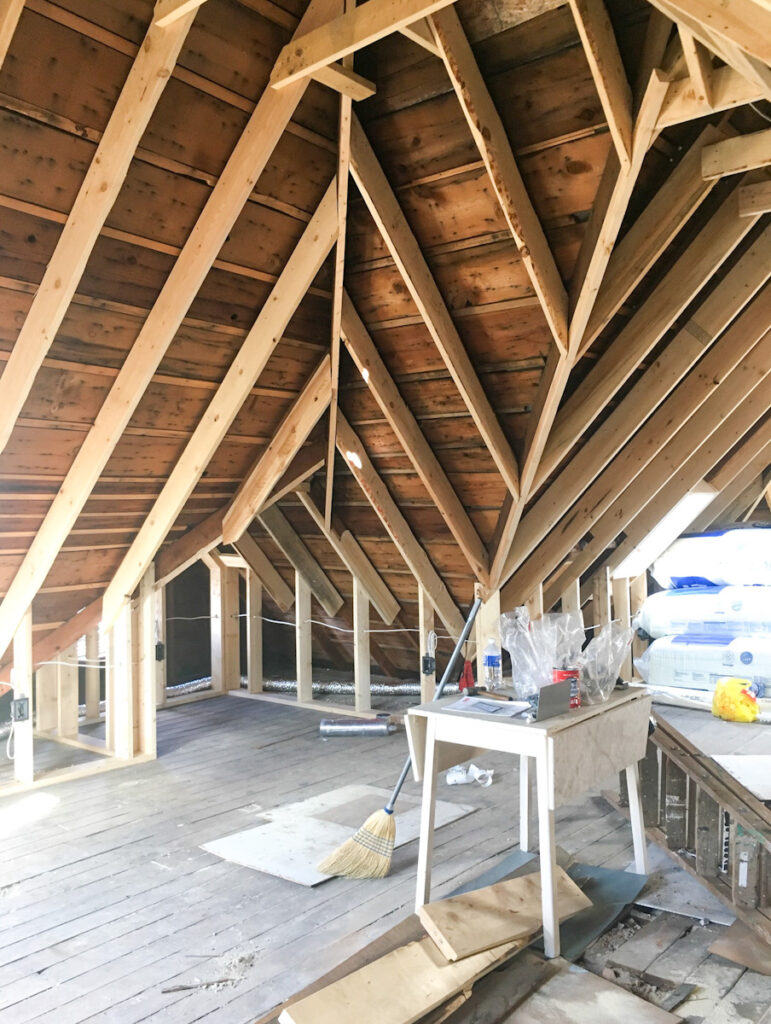
1. Clean Out and Assess the Structure
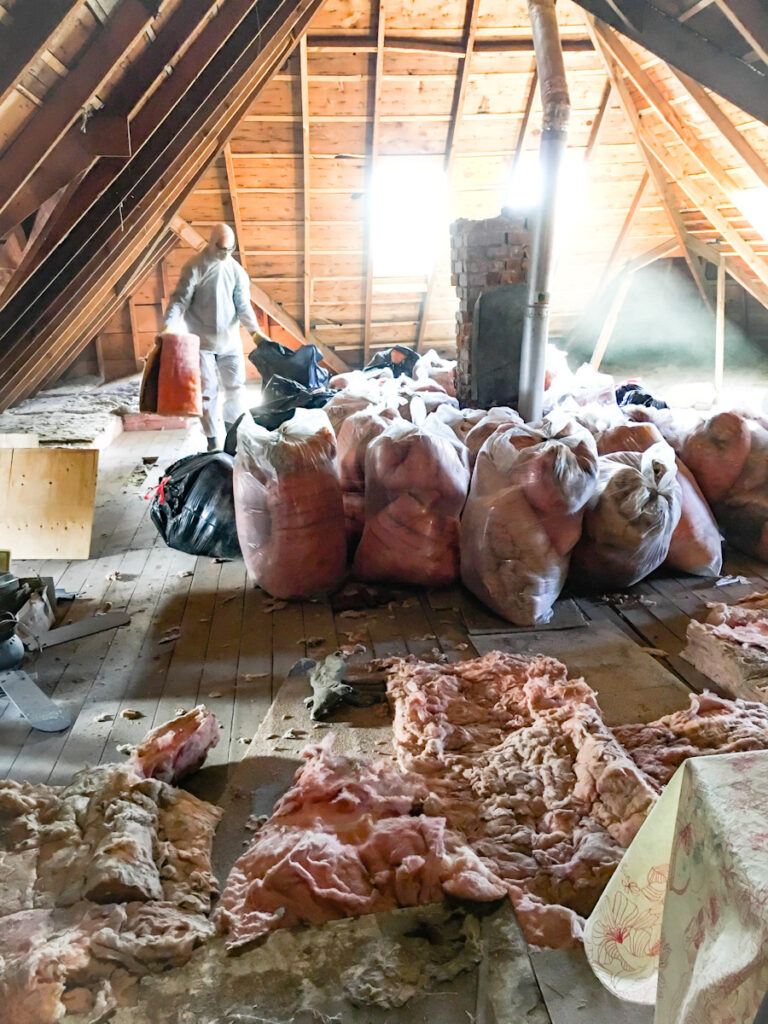
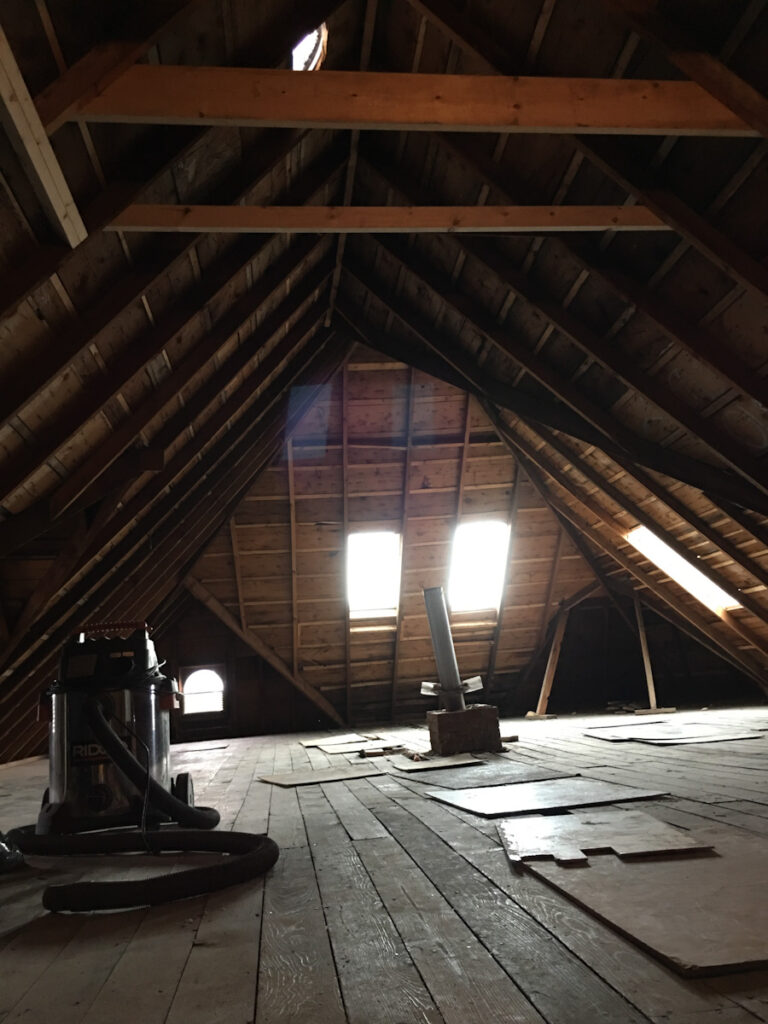
The very first step is clearing the space and bringing in a professional. Our attic was filled with dusty, dirty insulation and decades of debris.
Once we cleared it out, we had to have an engineer come in to assess the structure. Old houses were not always framed to support the weight of a finished living space.
The engineer gave us an idea of the sturdiness of the roofline and what we needed to do to safely put up shiplap walls. Never skip this step, knowing your structure is sound is the foundation of the entire project.
2. Plan for Proper Airflow and Insulation
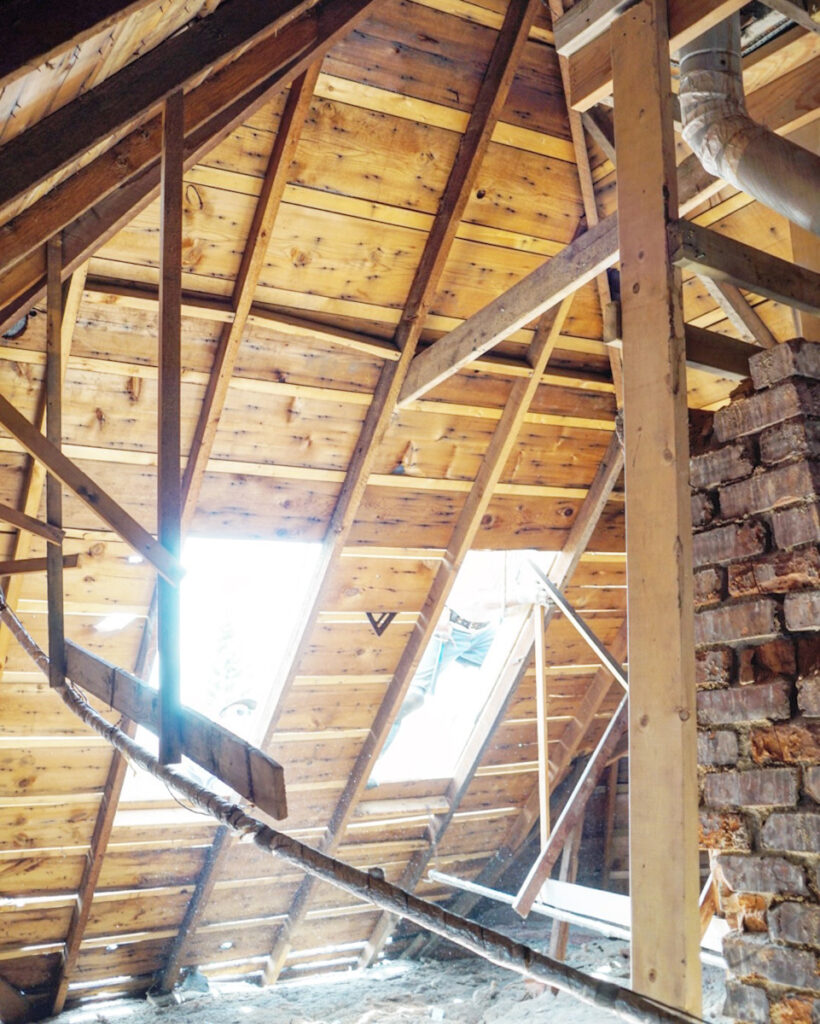
Insulation is one of the trickiest parts of this kind of renovation. We initially considered spray foam insulation, but it would have added approximately 1,500 pounds to a roof that was already sagging slightly.
Instead, we opted for 20-inch batting insulation. Because our home is a heritage property, we had to be incredibly careful about how we framed the interior walls.
We actually had to leave a foot and a half of space between the exterior roof and the interior walls to create an air gap. This airflow between the shingles and the home prevents ice dams and protects the warranty on our shingles.
We essentially built a whole new space inside the framed house. It took more planning, but it was the only way to do it right.
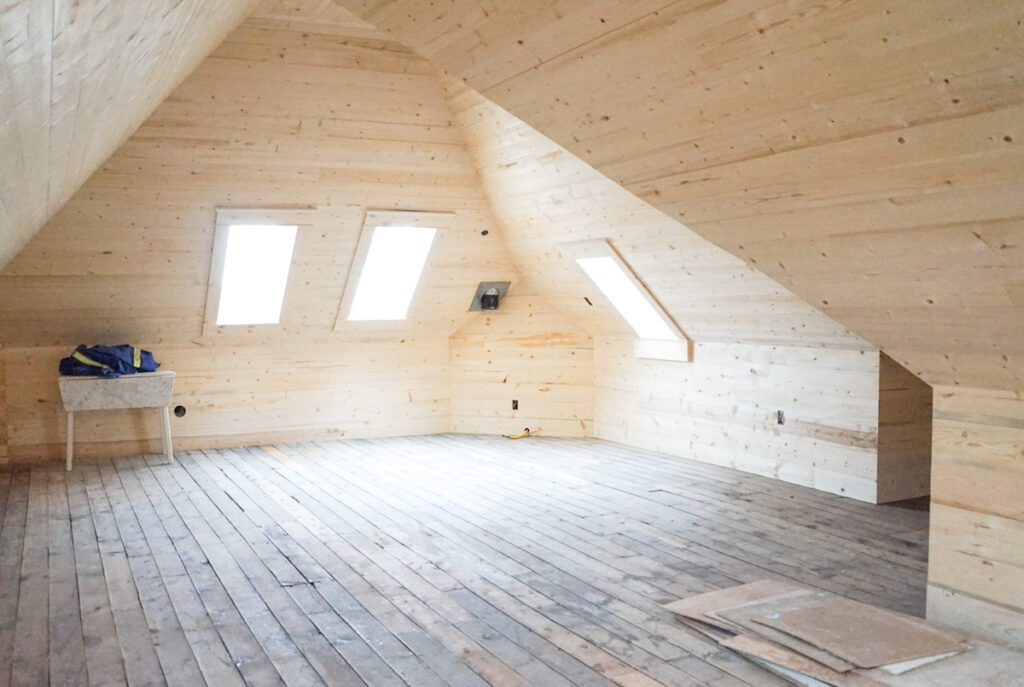
3. Add Natural Light with Skylights
Old attics are notoriously dark, so adding natural light is a crucial step in any attic renovation. We decided to cut skylights into the roofline to brighten the space.
Because our home is considered a heritage home, the roofline is a protected element. We had to go through the town and province to get the proper forms and permissions before making any changes.
It was worth the extra paperwork. The skylights brought this attic into the modern day, making it a bright, welcoming space for our family and my office.

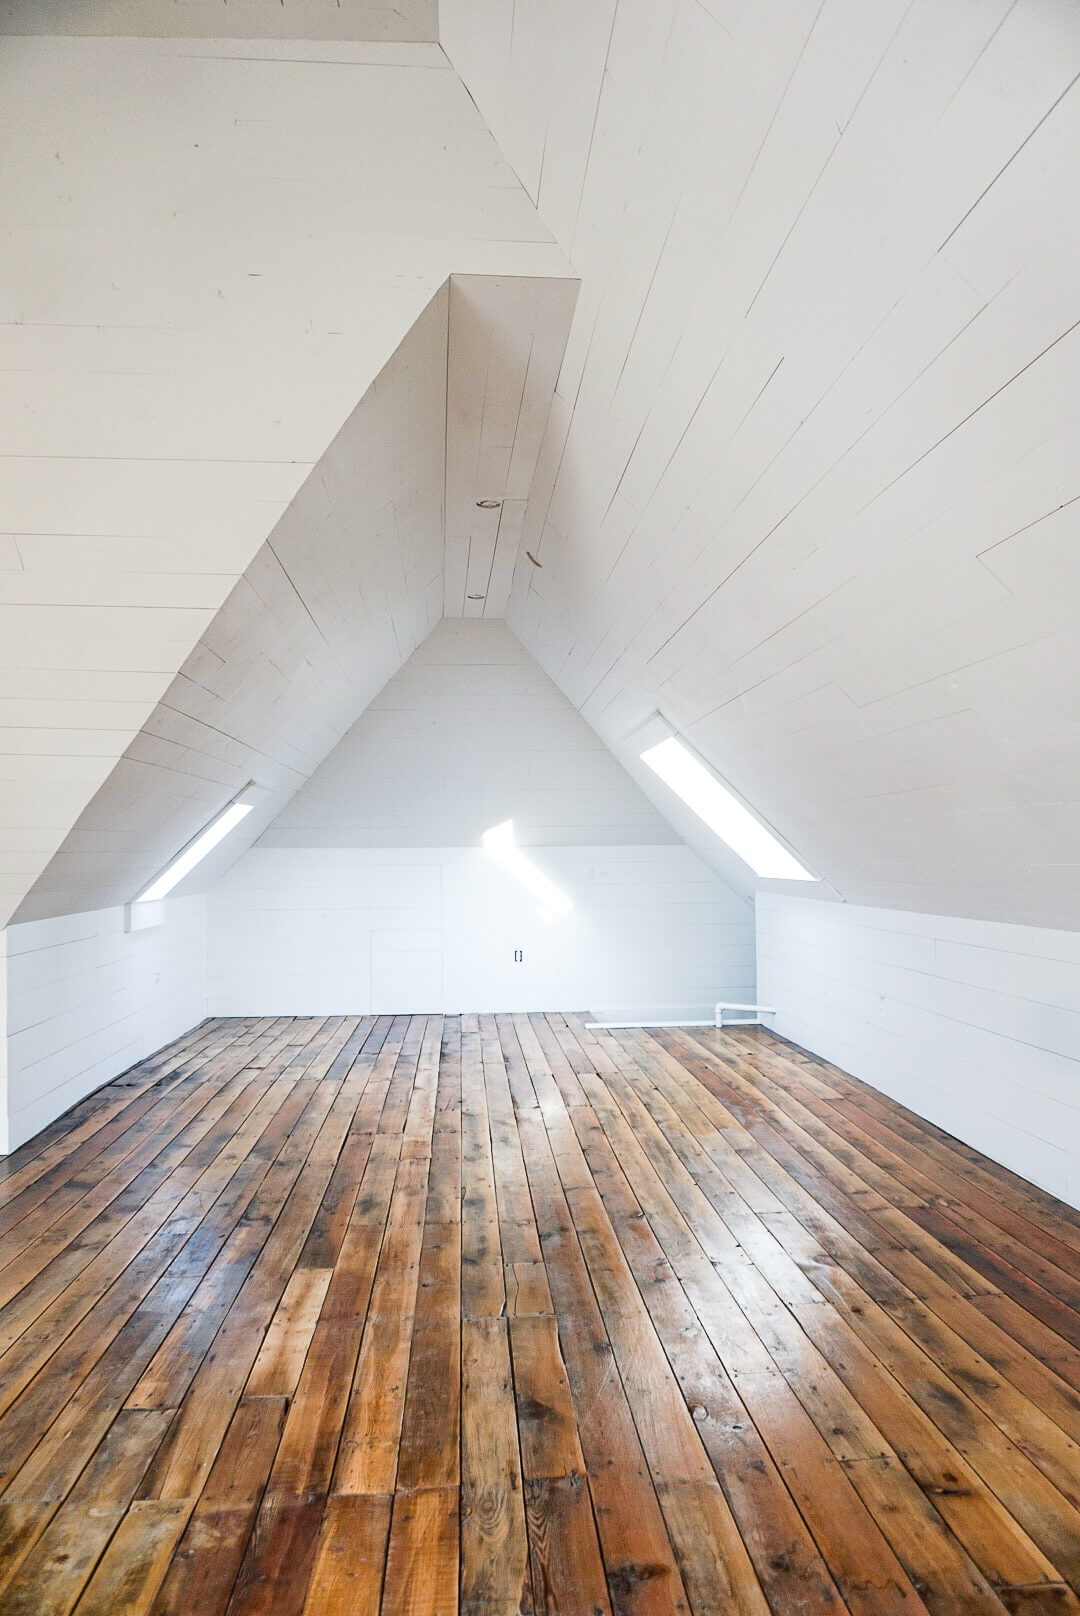
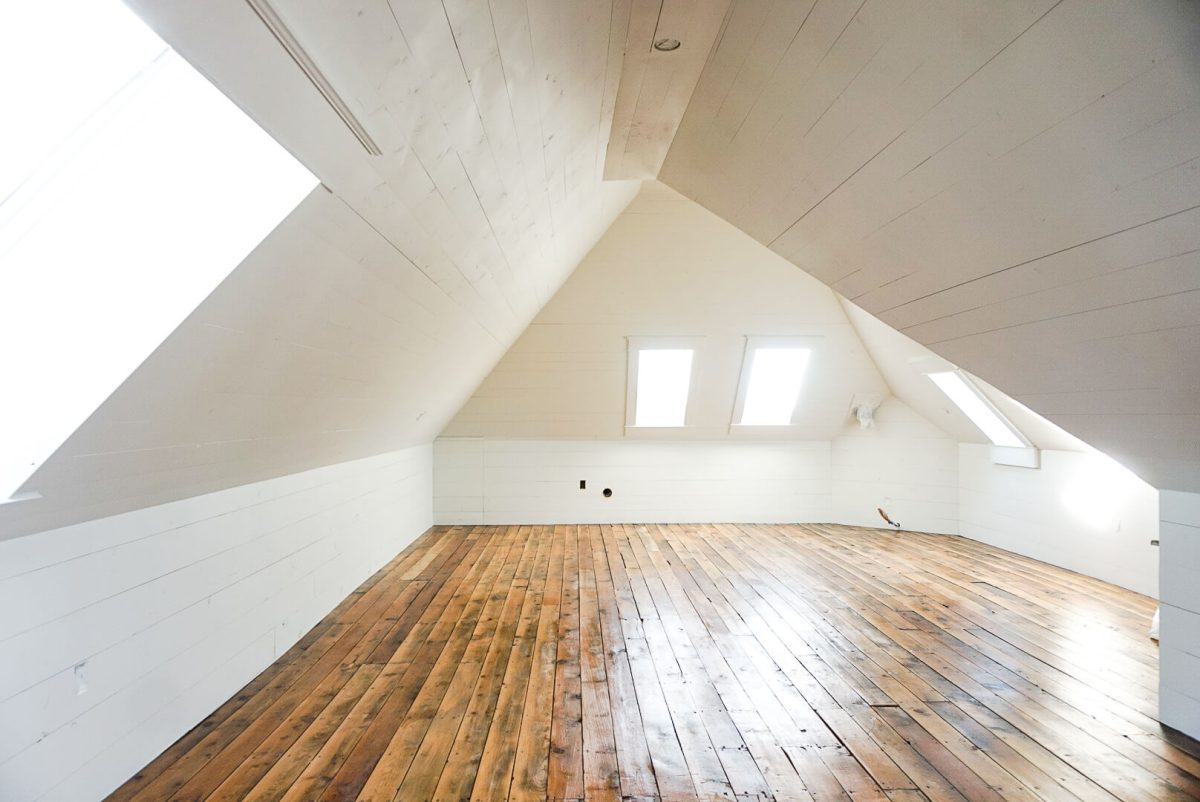
4. Refinish the Original Floors
One of the biggest surprises of this renovation was what we found under all the dirt. We rented a drum sander early in the week, and underneath the grime were beautiful, aged fir hardwood floors!
They were surface-nailed over 115 years ago and looked so authentic. I had originally planned to paint the floors white, but once we sanded them, I just could not put paint over that beautiful wood.
Because we did not have much ventilation up there, we used a water-based Varathane for floors in a crystal clear Satin finish. It went on almost like water using a sponge applicator, had little to no odor, and dried incredibly fast.
It took four coats, but the smooth surface it produced is unbelievable.
If you are tackling a similar project, I highly recommend reading my full guide on refinishing furniture to a wood finish for more tips on working with old wood.
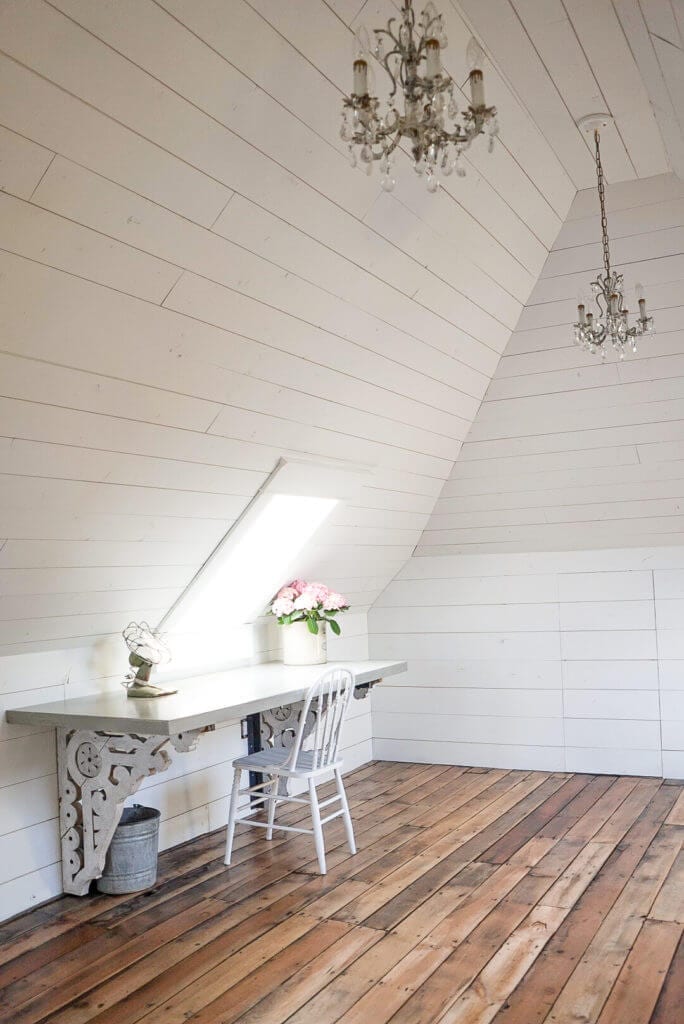
5. Install and Paint Shiplap Walls
Choosing the right wall treatment is key in any old home attic project. We used pine shiplap tongue-and-groove boards on the walls throughout the entire space.
Because it was raw pine, I decided to use a solid stain instead of paint. The stain provided much better coverage with far less product than paint would have required.
I went with my absolute favourite, Oxford White by Benjamin Moore, purchasing a 5-gallon pail to get more bang for my buck.
We used an industrial sprayer to apply it, which saved so much time and left a beautiful, smooth finish.
A quick word of warning: we used painter’s drop cloths instead of plastic to cover the floor, and some paint bled through! We had to use Goof Off Remover to scrub the fir floors clean, but the final result was worth the extra elbow grease.
If you want to try this yourself, check out my post on the do’s and don’ts of DIY shiplapping.
6. Navigate the Narrow Staircase
One of the most common challenges in an old home attic renovation is getting furniture up the stairs. Our staircase is extremely small, with a very sharp corner at the base.
Lifting anything through the new skylights would have required renting a crane! This meant that most of our larger pieces had to be assembled directly in the attic.


The hunt for a couch caused me some grief, but we eventually found an IKEA sectional that came in boxes we could carry up the stairs. If you are dealing with a tight staircase, always look for modular furniture.
We also brought up an antique dresser that I stripped down to raw wood.
You can read more about how I mix old and new pieces in my guide to shopping and decorating with vintage finds.
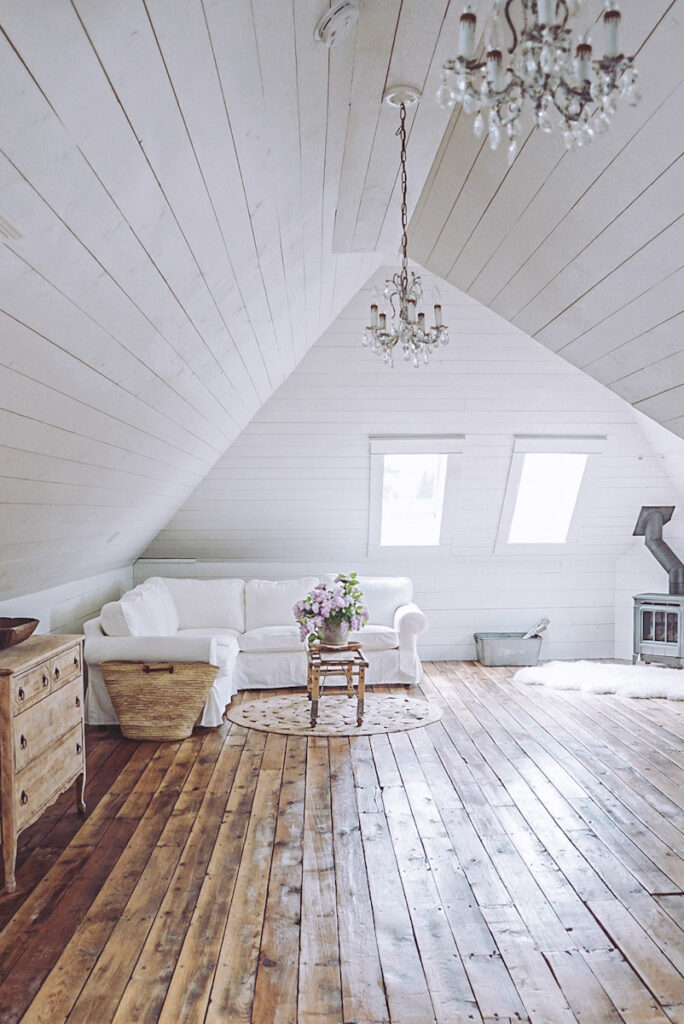
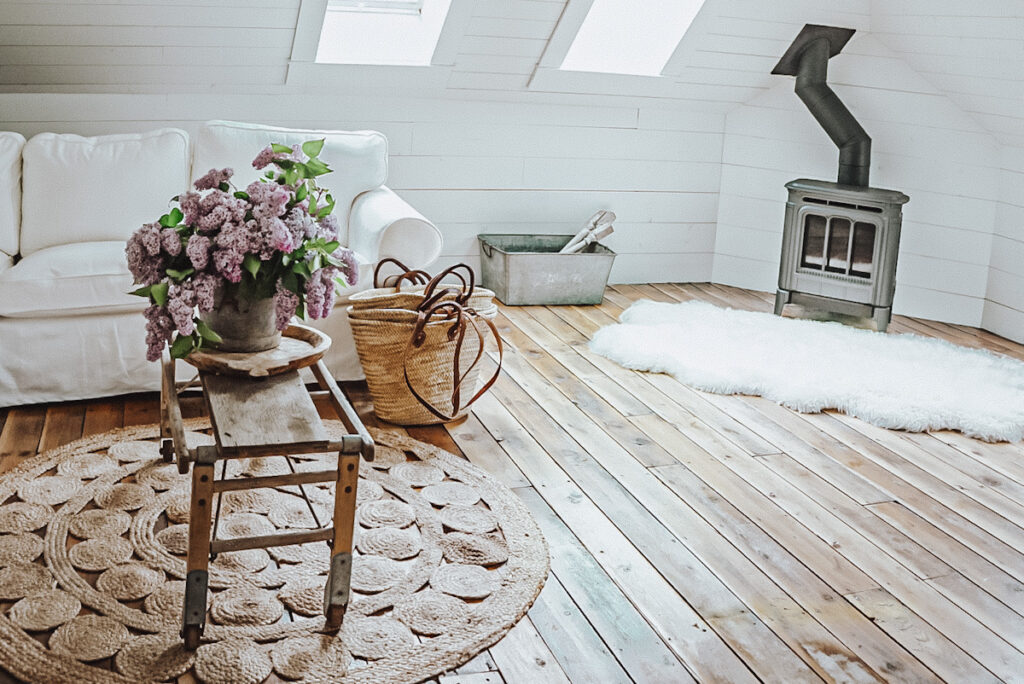
7. Create a Cozy, Multi-Purpose Space
The final step is making the space one you actually want to spend time in. We wanted this to be a cozy family room, but it also needed to function as my office.
We layered in texture with a jute rug, similar to the ones I used for my DIY jute stair floor runners, and added soft linens and a gas fireplace.
It is the perfect example of hygge style, creating warmth and comfort in a large space. This attic renovation was a whirlwind week of late nights and early mornings before my husband went back to work.
But sitting in front of the fire with our family makes every bit of that hard work worth it. This space is still one of my favourites in the entire house, and I think it always will be. It gave us so much additional square footage and completely changed how we live in our home.
If you love seeing how we transform spaces, take a look at our full Victorian home tour.
You can also read about our tiny house cabin build, which was inspired by the same cozy, intentional philosophy we brought to this attic.
What We Learned
Looking back, the biggest lesson from learning how to finish an attic in an old house is this: respect the building and work with it, not against it. Every decision we made, from the batting insulation to the heritage skylight permits, was guided by the original 1903 structure.
Old homes have a character and integrity that modern builds simply cannot replicate. Honouring that while still creating a modern, liveable space is the whole challenge, and the whole joy, of renovating a heritage property.
If you want to read more about our approach to simple living and intentional design, that post is a great place to start.
A Quick Summary
If you are planning your own project, here is a quick recap of how to finish an attic in an old house:
- Assess the structure – Always consult an engineer before adding weight to old framing.
- Plan your insulation – Leave an air gap for roof ventilation to prevent ice dams.
- Add natural light – Skylights transform dark attics, but check heritage rules first.
- Save original floors – Refinishing 115-year-old fir floors adds unmatched character.
- Use shiplap – A solid stain sprayer application saves time and looks beautiful.
- Plan for tight stairs – Buy modular furniture that can be assembled in the room.
- Make it cozy – Layer textures and add a fireplace for the ultimate family retreat.
More Posts You Might Love
- Shiplap Ceiling Ideas
- Vaulted Ceiling Ideas
- How To Renovate An Old House
- Shiplap Bathroom Ideas (Install Guide)
I hope this guide helps you see the potential in your own unfinished spaces. It was a massive project, but uncovering those fir floors and creating this cozy retreat was so worth it.
If you have questions about the insulation, the skylights, or the floor finish we used, leave a comment below. I read every single one!
xo, Deborah